No products in the cart.


Product Carousel Tabs
Auto, Cannabis Seeds, Free Seeds Promo, Sativa Dominant
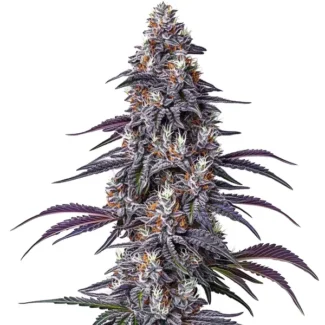
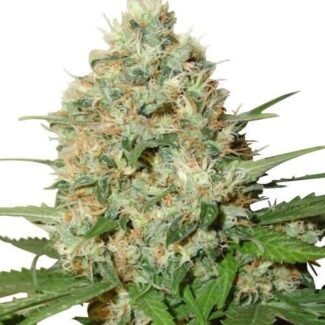
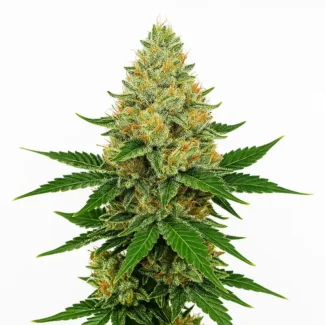
Auto Blue Dream Feminized (+ Free Seeds)
Free Seeds with Every Order (Mention your desired free strain in the comment field at checkout)
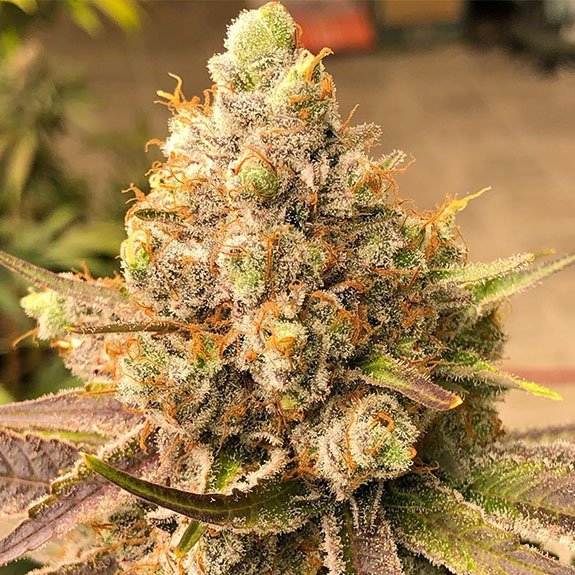
Blue Dream has long been an Aussie favorite for it’s balanced Sativa/Indica characteristics leaning towards Sativa dominant. Originating from California, Blue Dream is a cross between Blueberry (Indica) and Haze (Sativa). With a medium-high THC level between 15-21% THC, this strain is very high yielding and easy to grow leading to it’s popularity amongst novice and veteran cannabis growers.
Auto flowering seeds will flower on their own normally after 2-4 weeks of growth without any light schedule alteration, creating compact plants and with a shorter growing period.
As a Sativa dominant, Blue Dream is comparatively quick to grow but will produce larger high yielding plants up to 6 feet tall depending on conditions, with a 8-9 week flowering time and 700+ g/m2. This strain performs well indoors and outdoors with most cultivation methods. With a potent and intense fruity, sweet aroma similar to ripe berries, the high is reported to be creative, happy & euphoric. This strain is also popular with medicinal cannabis users to treat stress, depression and anxiety.
![]() 60% SATIVA – 40% INDICA
60% SATIVA – 40% INDICA
![]() FOR SOUVENIR PURPOSES ONLY
FOR SOUVENIR PURPOSES ONLY ![]()
![]() FEMINIZED & TOP QUALITY
FEMINIZED & TOP QUALITY ![]()
![]() MEDIUM / HIGH THC LEVEL 15-21%
MEDIUM / HIGH THC LEVEL 15-21%
![]() FAST, DISCREET, DOMESTIC SHIPPING
FAST, DISCREET, DOMESTIC SHIPPING ![]()
SKU: BlueDA

Auto, Cannabis Seeds, Multi pack, Sativa Dominant
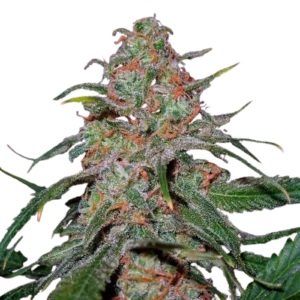
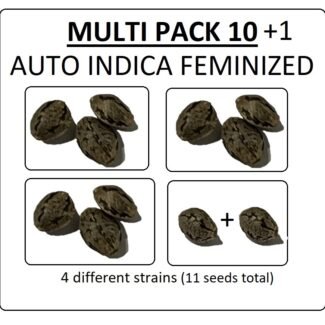
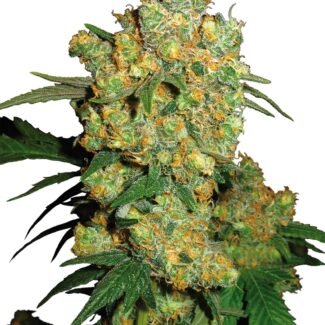
Multi Pack 10 AUTO Sativa Feminized Seeds
This multi-pack includes 4 of our top feminized AUTO Sativa strains (10+1 seeds total). Hand picked and top quality for your souvenir collection. We’ll ensure you receive up to 4 different feminized strains normally made up of a 3 x 3 x 3 x 2 (11 total) mixture of our most popular strains which may include AUTO Bruce Banner, AUTO Gorilla Glue, AUTO Amensia Haze, AUTO AK-47, AUTO Cocopopo
Auto flowering seeds will flower on their own normally after 2-4 weeks of growth without any light schedule alteration, creating compact plants and with a shorter growing period.
![]() SATIVA DOMINANT (AUTO FLOWERING)
SATIVA DOMINANT (AUTO FLOWERING)
![]() FOR SOUVENIR PURPOSES ONLY
FOR SOUVENIR PURPOSES ONLY ![]()
![]() FEMINIZED & TOP QUALITY
FEMINIZED & TOP QUALITY ![]()
![]() HIGH THC LEVEL
HIGH THC LEVEL
![]() FAST, DISCREET, DOMESTIC SHIPPING
FAST, DISCREET, DOMESTIC SHIPPING ![]()
SKU: n/a
Auto, Cannabis Seeds, Sativa Dominant
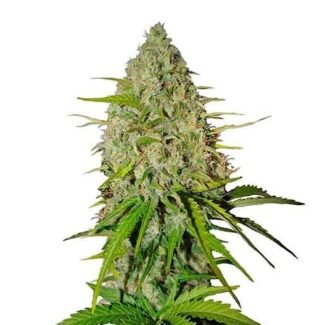
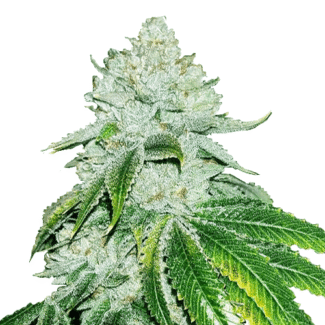
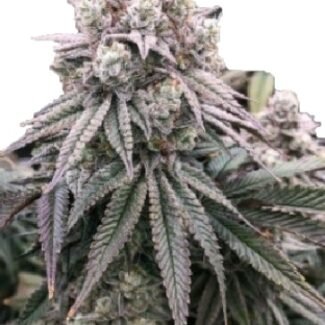
Auto Cocopopo Feminized
Here is a rare auto choco strain that will please the true connoisseurs and collectors. The distinctive sweet-bitter characteristics of the original Chocolope strain has been preserved in this high yielding autoflower variety.
The genetics are Cocopopo x Ruderalis which provide an intense aroma and unique flavour of deep notes of chocolate. As a prodominant Sativa strain the effects are uplifting, invigorating and euphoria-producing. The flower time is approx 9-10 weeks yielding between 450-600 g/m2 indoors. Outdoors it will reach a tall height of 70-140cm with a harvest normally after approx 80-90 days assuming the temp stays above 10 degrees celcius. This strain is definately a bit left of centre but well worth your attention!
![]() 75% SATIVA – 5% INDICA – 20% RUDERALIS
75% SATIVA – 5% INDICA – 20% RUDERALIS
![]() FOR SOUVENIR PURPOSES ONLY
FOR SOUVENIR PURPOSES ONLY ![]()
![]() FEMINIZED & TOP QUALITY
FEMINIZED & TOP QUALITY ![]()
![]() VERY HIGH THC LEVEL 20-25%
VERY HIGH THC LEVEL 20-25%
![]() FAST, DISCREET, DOMESTIC SHIPPING
FAST, DISCREET, DOMESTIC SHIPPING ![]()
SKU: coco
Auto, Cannabis Seeds, Free Seeds Promo, Highest THC, Most Popular, Sativa Dominant
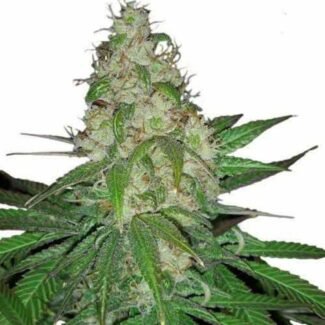
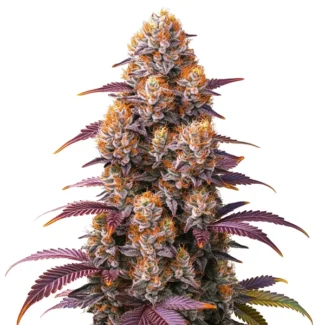
Auto Bruce Banner #5 Feminized (+ Free Seeds)
Auto, Cannabis Seeds, Free Seeds Promo, Highest THC, Most Popular, Sativa Dominant
Auto Bruce Banner #5 Feminized (+ Free Seeds)
Free Seeds with Every Order (Mention your desired free strain in the comment field at checkout)
The iconic Autoflowering Bruce Banner #5 is now available in Australia! This strain is super easy to grow and offers very heavy yielding plants with thick, intense diesel flavoured fruity buds. As an Autoflower, the plant is medium-sized and performs well indoors and outdoors with any of the available cultivation methods.
Auto flowering seeds will flower on their own normally after 2-4 weeks of growth without any light schedule alteration, creating compact plants and with a shorter growing period.
Bruce Banner has a massive cult following over many years with a flavour posessing distinct earthy wood with sweet strawberry undertones. As a Sativa dominant, this strain is highly energising and great for daytime motivation and creativity. Expect a flowering time of 7-8 weeks with a yield of 500 g/m2 and plant height of 80-120cm with flowing at any photoperiod between 12-18 hours so long as the temperature is above 10°C absolute min.
![]() 55% SATIVA – 25% INDICA – 20% RUDERALIS
55% SATIVA – 25% INDICA – 20% RUDERALIS
![]() FOR SOUVENIR PURPOSES ONLY
FOR SOUVENIR PURPOSES ONLY ![]()
![]() FEMINIZED & TOP QUALITY
FEMINIZED & TOP QUALITY ![]()
![]() VERY HIGH THC LEVEL 23%
VERY HIGH THC LEVEL 23%
![]() FAST, DISCREET, DOMESTIC SHIPPING
FAST, DISCREET, DOMESTIC SHIPPING ![]()
SKU: BBA
Auto, Cannabis Seeds, Free Seeds Promo, Highest THC, Most Popular, Sativa Dominant
Auto Gorilla Glue Feminized Seeds (+ Free Seeds)
Auto, Cannabis Seeds, Free Seeds Promo, Highest THC, Most Popular, Sativa Dominant
Auto Gorilla Glue Feminized Seeds (+ Free Seeds)
Free Seeds with Every Order (Mention your desired free strain in the comment field at checkout)
One of the strongest cannabis strains available this one is recommended for the serious marijuana consumer! This popular strain has also won several cannabis awards like the Michigan and Los Angeles Cannabis Cups in 2014, and the High Times Jamaican World Cup.
Auto flowering seeds will flower on their own normally after 2-4 weeks of growth without any light schedule alteration, creating compact plants and with a shorter growing period.
![]() 50% INDICA – 50% SATIVA
50% INDICA – 50% SATIVA
![]() FOR SOUVENIR PURPOSES ONLY
FOR SOUVENIR PURPOSES ONLY ![]()
![]() FEMINIZED & TOP QUALITY
FEMINIZED & TOP QUALITY ![]()
![]() VERY HIGH THC LEVEL 19-24%
VERY HIGH THC LEVEL 19-24%
![]() FAST, DISCREET, DOMESTIC SHIPPING
FAST, DISCREET, DOMESTIC SHIPPING ![]()
SKU: GGA

Auto, Cannabis Seeds, Sativa Dominant
Auto Amnesia Haze Feminized
The Dutch classic! This Sativa dominent strain has won several cannabis cups over the years and is charicterized by mouth watering notes of lemon, incense and cedarwood with a very uplifting & stimulating high. This Sativa has a longer flowering time but the patient grower will be rewarded with a truly supreme quality outstanding end product.
Auto flowering seeds will flower on their own normally after 2-4 weeks of growth without any light schedule alteration, creating compact plants and with a shorter growing period.
![]() 10% INDICA – 90% SATIVA
10% INDICA – 90% SATIVA
![]() FOR SOUVENIR PURPOSES ONLY
FOR SOUVENIR PURPOSES ONLY ![]()
![]() FEMINIZED & TOP QUALITY
FEMINIZED & TOP QUALITY ![]()
![]() VERY HIGH THC LEVEL 21-25%
VERY HIGH THC LEVEL 21-25%
![]() FAST, DISCREET, DOMESTIC SHIPPING
FAST, DISCREET, DOMESTIC SHIPPING ![]()
SKU: AHA
Auto, Cannabis Seeds, Free Seeds Promo, Highest THC, Sativa Dominant
Auto AK-47 Feminized Seeds (+ Free Seeds)
Auto, Cannabis Seeds, Free Seeds Promo, Highest THC, Sativa Dominant
Auto AK-47 Feminized Seeds (+ Free Seeds)
Free Seeds with Every Order (Mention your desired free strain in the comment field at checkout)
Ak-47 was orginally created by the Netherland’s Serious Seeds in 1992 and has won 16 awards including the High Times Cannabis Cup. People love this strain around the world for its high THC content, strong flavour and high energy effects.
Auto flowering seeds will flower on their own normally after 2-4 weeks of growth without any light schedule alteration, creating compact plants and with a shorter growing period.
![]() 20% INDICA – 80% SATIVA
20% INDICA – 80% SATIVA
![]() FOR SOUVENIR PURPOSES ONLY
FOR SOUVENIR PURPOSES ONLY ![]()
![]() FEMINIZED & TOP QUALITY
FEMINIZED & TOP QUALITY ![]()
![]() VERY HIGH THC LEVEL 18-23%
VERY HIGH THC LEVEL 18-23%
![]() FAST, DISCREET, DOMESTIC SHIPPING
FAST, DISCREET, DOMESTIC SHIPPING ![]()
SKU: AKA
Cannabis Seeds, Exotic Strains, Highest THC, Most Popular, NEW, Photo Period, Sativa Dominant
Mimosa Famosa Feminized Seeds
Cannabis Seeds, Exotic Strains, Highest THC, Most Popular, NEW, Photo Period, Sativa Dominant
Mimosa Famosa Feminized Seeds
Mimosa Famosa, is the upgraded version of the popular ‘Mimosa’ or ‘Purple Mimosa’ which is consistently one of the most potent THC strains around. The ‘Famosa’ version has even higher THC and more intense terpenes. While this strain packs a serious punch, it’s sativa dominant hybrid genetics offer a vibrant, uplifting even talkative high. The flavor of this strain is sour & citrusy with earthy pine notes and a smooth finish.
This strain has been expertly crafted by crossing 2 amazing strains ‘Clementine’ and ‘Purple Punch so the finish can have a nice purple hue and the yield is huge up to 1000 g/m2 with a 9-10 week flowering time indoors. This strain has long branches and tends to be quite bush especially if grown outdoors.
![]() 30% INDICA – 70% SATIVA
30% INDICA – 70% SATIVA
![]() FEMINIZED & TOP QUALITY
FEMINIZED & TOP QUALITY ![]()
![]() VERY VERY! HIGH THC LEVEL 25-33%
VERY VERY! HIGH THC LEVEL 25-33%
![]() FAST, DISCREET, DOMESTIC SHIPPING
FAST, DISCREET, DOMESTIC SHIPPING ![]()
SKU: MF
ON SALE (20% OFF), Photo Period, Sativa Dominant
Amnesia Haze Feminized (On sale)
The Dutch classic! This world famous Sativa dominant strain has won several cannabis cups over the years and is characterized by mouth watering notes of lemon, incense and cedarwood with a very uplifting & stimulating high. This Sativa has a longer flowering time but the patient grower will be rewarded with a truly supreme quality outstanding end product.
This strain is loved for its energetic daytime high, creative spark and old-school Amsterdam pedigree.
![]() 10% INDICA – 90% SATIVA
10% INDICA – 90% SATIVA
![]() FEMINIZED & TOP QUALITY
FEMINIZED & TOP QUALITY ![]()
![]() VERY HIGH THC LEVEL 21-25%
VERY HIGH THC LEVEL 21-25%
![]() FAST, DISCREET, DOMESTIC SHIPPING
FAST, DISCREET, DOMESTIC SHIPPING ![]()
SKU: AH
Cannabis Seeds, Free Seeds Promo, Photo Period, Sativa Dominant
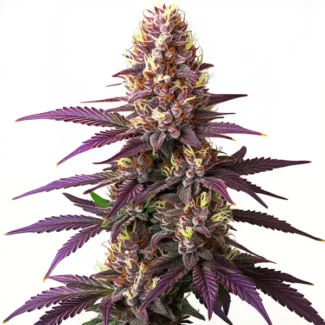
Purple Haze Feminized (+ Free Seeds)
Free Seeds with Every Order (Mention your desired free strain in the comment field at checkout)
Purple Haze was made famous in the 60’s by the Rockstar legend Jimi Hendrix’s. With a 60% sativa and 40% indica blend, this incredibly popular strain originated from Thailand as a cross between Haze & Purple Thai. Strong enough to pack a good punch, but not too crazy, this strain delivers a creative and euphoric high with a pleasant flavour of grape, berry and lavender.
Growing Purple Haze is a straight forward with plants thriving both indoors and outdoors with large yields of 600+m p/2. The plants will reach a medium height, with a distinct purple hue of the flowers when fresh, dulling to a slight purple once dried with a wonderful smell. As this variety has been cultivated for many many years, you can be assured of a stable phenotype that is derived only from the best genetic offerings available today.
![]() 60% SATIVA – 40% INDICA
60% SATIVA – 40% INDICA
![]() FOR SOUVENIR PURPOSES ONLY
FOR SOUVENIR PURPOSES ONLY ![]()
![]() FEMINIZED & TOP QUALITY
FEMINIZED & TOP QUALITY ![]()
![]() MEDIUM / HIGH THC LEVEL 14-19%
MEDIUM / HIGH THC LEVEL 14-19%
![]() FAST, DISCREET, DOMESTIC SHIPPING
FAST, DISCREET, DOMESTIC SHIPPING ![]()
SKU: PH
Cannabis Seeds, Free Seeds Promo, Photo Period, Sativa Dominant
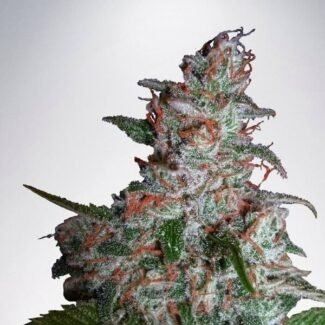
Blue Dream Feminized (+ Free Seeds)
Free Seeds with Every Order (Mention your desired free strain in the comment field at checkout)
Blue Dream has long been an Aussie favorite for it’s balanced Sativa/Indica characteristics leaning towards Sativa dominant. Originating from California, Blue Dream is a cross between Blueberry (Indica) and Haze (Sativa). With a medium-high THC level between 15-21% THC, this strain is very high yielding and easy to grow leading to it’s popularity amongst novice and veteran cannabis growers.
As a Sativa dominant, Blue Dream is comparatively quick to grow but will produce larger high yielding plants up to 6 feet tall depending on conditions, with a 8-9 week flowering time and 700+ g/m2. This strain performs well indoors and outdoors with most cultivation methods. With a potent and intense fruity, sweet aroma similar to ripe berries, the high is reported to be creative, happy & euphoric. This strain is also popular with medicinal cannabis users to treat stress, depression and anxiety.
![]() 60% SATIVA – 40% INDICA
60% SATIVA – 40% INDICA
![]() FOR SOUVENIR PURPOSES ONLY
FOR SOUVENIR PURPOSES ONLY ![]()
![]() FEMINIZED & TOP QUALITY
FEMINIZED & TOP QUALITY ![]()
![]() MEDIUM / HIGH THC LEVEL 15-21%
MEDIUM / HIGH THC LEVEL 15-21%
![]() FAST, DISCREET, DOMESTIC SHIPPING
FAST, DISCREET, DOMESTIC SHIPPING ![]()
SKU: BlueD
Cannabis Seeds, Exotic Strains, ON SALE (20% OFF), Photo Period, Sativa Dominant
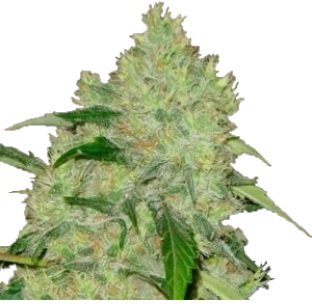
Lemon Skunk Feminized (On Sale)
Cannabis Seeds, Exotic Strains, ON SALE (20% OFF), Photo Period, Sativa Dominant
Lemon Skunk Feminized (On Sale)
Lemon Skunk has several first place awards with it’s unique scent, taste and high making it a cannabis connoisseur specialty. Lemon Skunk is a cross between two skunk strains, Skunk #1 and Citris Skunk. Scoring a first place award during the High Life Cup in 2007 and others, this potent strain has complex lemon grass, lemon, orange, cedarwood flavors.
Lemon Skunk grows well in both indoor and outdoor conditions but grows quite large so make sure you have a big space. The flowering time is normally 7-9 weeks with the buds often containing patches of golden oranges with medium size leaves.
Many reviewers describe the Lemon Skunk high as introspection, long lasting and creative. This is a great strain for breeders of all levels you will not be disappointed.
![]() 60% SATIVA – 40% INDICA
60% SATIVA – 40% INDICA
![]() FOR SOUVENIR PURPOSES ONLY
FOR SOUVENIR PURPOSES ONLY ![]()
![]() FEMINIZED & TOP QUALITY
FEMINIZED & TOP QUALITY ![]()
![]() HIGH THC LEVEL 14-22%
HIGH THC LEVEL 14-22%
![]() FAST, DISCREET, DOMESTIC SHIPPING
FAST, DISCREET, DOMESTIC SHIPPING ![]()
SKU: LS
Cannabis Seeds, Free Seeds Promo, Highest THC, Most Popular, Photo Period, Sativa Dominant
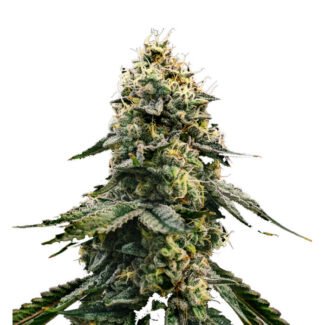
Bruce Banner #5 Feminized (+ Free Seeds)
Cannabis Seeds, Free Seeds Promo, Highest THC, Most Popular, Photo Period, Sativa Dominant
Bruce Banner #5 Feminized (+ Free Seeds)
Free Seeds with Every Order (Mention your desired free strain in the comment field at checkout)
The iconic cult classic ultra high THC Bruce Banner #5 is available in Australia! This strain is super easy to grow and offers very heavy yielding plants with thick, intense diesel flavoured fruity buds. As a Sativa dominent, expect larger plants, quite tall with long bushy stems with heavy yields. This strain performs well indoors and outdoors with any of the available cultivation methods.
Bruce Banner has a massive cult following over many years with a flavour posessing distinct earthy wood with sweet strawberry undertones. As a Sativa dominant, this strain with a mix of OG Kush + Strawberry Punch Diesel is highly energising and great for daytime motivation and creativity. Expect a flowering time of 9-11 weeks with a yield of 700 g/m2 and plant height of 150cm with flowing so long as the temperature is above 15°C absolute min.
![]() 65% SATIVA – 35% INDICA
65% SATIVA – 35% INDICA
![]() FOR SOUVENIR PURPOSES ONLY
FOR SOUVENIR PURPOSES ONLY ![]()
![]() FEMINIZED & TOP QUALITY
FEMINIZED & TOP QUALITY ![]()
![]() VERY VERY HIGH THC LEVEL 29%
VERY VERY HIGH THC LEVEL 29%
![]() FAST, DISCREET, DOMESTIC SHIPPING
FAST, DISCREET, DOMESTIC SHIPPING ![]()
SKU: BB
Cannabis Seeds, Exotic Strains, Photo Period, Sativa Dominant
Grapefruit Feminized Seeds
The Vancouver, Canada born strain known and loved for decades is a real uplifter! This 80% Sativa strain has a sweet and fruity aroma similar to the smell of ripe grapefruit It’s an 80’s old secret mix of Cinderalla 99 with a mystical grapefruit flavoured Sativa. With the smell of pineapple and grapefuit this has an uplifting & stimulating high good for focus, creativity and pleasure.
![]() 20% INDICA – 80% SATIVA
20% INDICA – 80% SATIVA
![]() FOR SOUVENIR PURPOSES ONLY
FOR SOUVENIR PURPOSES ONLY ![]()
![]() FEMINIZED & TOP QUALITY
FEMINIZED & TOP QUALITY ![]()
![]() HIGH THC LEVEL 16-18%
HIGH THC LEVEL 16-18%
![]() FAST, DISCREET, DOMESTIC SHIPPING
FAST, DISCREET, DOMESTIC SHIPPING ![]()
SKU: GF
Cannabis Seeds, Photo Period, Sativa Dominant
Sour Diesel Feminized Seeds
Sour D, is renown across North America for it’s very strong sativa dominated effects and unique diesel fuel odour when smoked. Around since the 90s, it was created by crossing Chemdawg and Super Skunk. Sour Diesel has an intense flavour and aroma, with notes of lemon, exotic wood, diesel fuel and spices.
![]() 40% INDICA – 60% SATIVA
40% INDICA – 60% SATIVA
![]() FOR SOUVENIR PURPOSES ONLY
FOR SOUVENIR PURPOSES ONLY ![]()
![]() FEMINIZED & TOP QUALITY
FEMINIZED & TOP QUALITY ![]()
![]() VERY HIGH THC LEVEL 19-24%
VERY HIGH THC LEVEL 19-24%
![]() FAST, DISCREET, DOMESTIC SHIPPING
FAST, DISCREET, DOMESTIC SHIPPING ![]()
SKU: SD
Cannabis Seeds, Free Seeds Promo, Highest THC, Photo Period, Sativa Dominant
AK-47 Feminized Seeds (+Free Seeds)
Cannabis Seeds, Free Seeds Promo, Highest THC, Photo Period, Sativa Dominant
AK-47 Feminized Seeds (+Free Seeds)
Free Seeds with Every Order (Mention your desired free strain in the comment field at checkout)
Ak-47 was orginally created by the Netherland’s Serious Seeds in 1992 and has won 16 awards including the High Times Cannabis Cup. People love this strain around the world for its high THC content, strong flavour and high energy effects.
![]() 20% INDICA – 80% SATIVA
20% INDICA – 80% SATIVA
![]() FOR SOUVENIR PURPOSES ONLY
FOR SOUVENIR PURPOSES ONLY ![]()
![]() FEMINIZED & TOP QUALITY
FEMINIZED & TOP QUALITY ![]()
![]() VERY HIGH THC LEVEL 18-23%
VERY HIGH THC LEVEL 18-23%
![]() FAST, DISCREET, DOMESTIC SHIPPING
FAST, DISCREET, DOMESTIC SHIPPING ![]()
SKU: AK
Product Carousel Tabs
Auto, Cannabis Seeds, Indica Dominant, Multi pack
Multi Pack 10 AUTO Indica Feminized Seeds
This multi-pack includes 4 of our top feminized Indica strains (10+1 seeds total). Hand picked and top quality for your souvenir collection. We’ll ensure you receive up to 4 different feminized strains normally made up of a 3 x 3 x 3 x 2 (11 total) mixture of our most popular strains which may include AUTO Northern Lights, AUTO White Widow, AUTO Gelato, AUTO Blueberry, AUTO Bubblegum, AUTO Cocopopo
Auto flowering seeds will flower on their own normally after 2-4 weeks of growth without any light schedule alteration, creating compact plants and with a shorter growing period.
![]() INDICA DOMINANT (Auto Flowering)
INDICA DOMINANT (Auto Flowering)
![]() FOR SOUVENIR PURPOSES ONLY
FOR SOUVENIR PURPOSES ONLY ![]()
![]() FEMINIZED & TOP QUALITY
FEMINIZED & TOP QUALITY ![]()
![]() HIGH THC LEVEL
HIGH THC LEVEL
![]() FAST, DISCREET, DOMESTIC SHIPPING
FAST, DISCREET, DOMESTIC SHIPPING ![]()
SKU: n/a
Auto, Cannabis Seeds, Free Seeds Promo, Indica Dominant
Auto White Widow Feminized (+ Free Seeds)
Free Seeds with Every Order (Mention your desired free strain in the comment field at checkout)
White Widow is quite possibly the most famous Cannabis strain ever. Originally cultivated in the Netherlands, this balanced Indica/Sativa is a cross between Brazilian Sativa Landrace and a special resin enhanced South Indian Indica. WW has been a prominent staple of the Dutch coffeeshops for over 25 years. Our feminized version is very well balanced through selective breeding with only the highest quailty phenotypes. White Widow has brought us many varieites such as White Russian, Blue Widow, and White Rhino, however there is nothing like the first and the best strain, which flowers in 60 days indoors. These are high quality seeds that are sure to impress.
Auto flowering seeds will flower on their own normally after 2-4 weeks of growth without any light schedule alteration, creating compact plants and with a shorter growing period.
![]() 60% INDICA – 40% SATIVA
60% INDICA – 40% SATIVA
![]() FOR SOUVENIR PURPOSES ONLY
FOR SOUVENIR PURPOSES ONLY ![]()
![]() FEMINIZED & TOP QUALITY
FEMINIZED & TOP QUALITY ![]()
![]() VERY HIGH THC LEVEL 18-21%
VERY HIGH THC LEVEL 18-21%
![]() FAST, DISCREET, DOMESTIC SHIPPING
FAST, DISCREET, DOMESTIC SHIPPING ![]()
SKU: WWA
Auto, Cannabis Seeds, Free Seeds Promo, Highest THC, Indica Dominant
Auto Gelato Feminized Seeds (+ Free Seeds)
Auto, Cannabis Seeds, Free Seeds Promo, Highest THC, Indica Dominant
Auto Gelato Feminized Seeds (+ Free Seeds)
Free Seeds with Every Order (Mention your desired free strain in the comment field at checkout)
Fruity Gelato Goodness… This is an amazing strain! Another ‘Cali’ wonder, this strain is a combination of Girl Scout Cookies and Sunset Sherbet with a desert-like sweet taste and super strong potency, this strain is very popular among serious marijuana enthusiasts.
![]() 70% INDICA – 30% SATIVA
70% INDICA – 30% SATIVA
![]() FOR SOUVENIR PURPOSES ONLY
FOR SOUVENIR PURPOSES ONLY ![]()
![]() FEMINIZED & TOP QUALITY
FEMINIZED & TOP QUALITY ![]()
![]() VERY HIGH THC LEVEL 21-25%
VERY HIGH THC LEVEL 21-25%
![]() FAST, DISCREET, DOMESTIC SHIPPING
FAST, DISCREET, DOMESTIC SHIPPING ![]()
SKU: GelatoA
Auto, Cannabis Seeds, Indica Dominant
Auto Blueberry Feminized Seeds
Auto Blueberry has a sweet fruity flavour and aroma, with notes of blueberry and spices. These autos can be flowered any time of the year provided temperature stays above 10°C. This cross between Blueberry and a Canadian Ruderalis produces stout plants with flowers that have medium to large calyxes with red, purple and also blue colors, especially when grown during lower temperature at night. This genetical mixture is a true masterpiece!
Auto flowering seeds will flower on their own normally after 2-4 weeks of growth without any light schedule alteration, creating compact plants and with a shorter growing period.
![]() 70% INDICA – 10% SATIVA – 20% Ruderalis
70% INDICA – 10% SATIVA – 20% Ruderalis
![]() FOR SOUVENIR PURPOSES ONLY
FOR SOUVENIR PURPOSES ONLY ![]()
![]() FEMINIZED, AUTO & TOP QUALITY
FEMINIZED, AUTO & TOP QUALITY ![]()
![]() HIGH THC LEVEL 19-20%
HIGH THC LEVEL 19-20%
![]() FAST, DISCREET, DOMESTIC SHIPPING
FAST, DISCREET, DOMESTIC SHIPPING ![]()
SKU: Blue
Auto, Cannabis Seeds, Free Seeds Promo, Indica Dominant
Auto Northern Lights Feminized Seeds (+ Free Seeds)
Auto, Cannabis Seeds, Free Seeds Promo, Indica Dominant
Auto Northern Lights Feminized Seeds (+ Free Seeds)
Free Seeds with Every Order (Mention your desired free strain in the comment field at checkout)
Hmmm probably the most famous strain of all time? And for good reason….. A strong Indica praised for its remarkably resinous buds, fast flowering and easy to grow resilience. This strain has been setting the standard for decades! Well worth your attention, these are fast growing high quality seeds with wow factor.
Auto flowering seeds will flower on their own normally after 2-4 weeks of growth without any light schedule alteration, creating compact plants and with a shorter growing period.
![]() 90% INDICA – 10% SATIVA
90% INDICA – 10% SATIVA
![]() FOR SOUVENIR PURPOSES ONLY
FOR SOUVENIR PURPOSES ONLY ![]()
![]() FEMINIZED & TOP QUALITY
FEMINIZED & TOP QUALITY ![]()
![]() VERY HIGH THC LEVEL 19-24%
VERY HIGH THC LEVEL 19-24%
![]() FAST, DISCREET, DOMESTIC SHIPPING
FAST, DISCREET, DOMESTIC SHIPPING ![]()
SKU: NLA
Auto, Cannabis Seeds, Indica Dominant
Auto Bubblegum Feminized Seeds
After coming to Holland from USA as a clone-only strain, Bubblegum became an immediate hit across Europe. It has a large bubbly buds and a very powerful effect and can easily surprise those who need emotional and physical relief. This strain has a unique bubble gum smell too due to it’s cross with South Indian x Holland x Blueberry genetics. Its effect is balanced, powerful, physical and cerebral. Initially stimulating and invigorating. A connoisseurs specialty.
Auto flowering seeds will flower on their own normally after 2-4 weeks of growth without any light schedule alteration, creating compact plants and with a shorter growing period.
![]() 80% INDICA – 20% SATIVA
80% INDICA – 20% SATIVA
![]() FOR SOUVENIR PURPOSES ONLY
FOR SOUVENIR PURPOSES ONLY ![]()
![]() FEMINIZED, AUTO & TOP QUALITY
FEMINIZED, AUTO & TOP QUALITY ![]()
![]() VERY HIGH THC LEVEL 20-27%
VERY HIGH THC LEVEL 20-27%
![]() FAST, DISCREET, DOMESTIC SHIPPING
FAST, DISCREET, DOMESTIC SHIPPING ![]()
SKU: BGA
Cannabis Seeds, Exotic Strains, Highest THC, Indica Dominant, NEW, Photo Period
Runtz Gluntz Feminized Seeds
Cannabis Seeds, Exotic Strains, Highest THC, Indica Dominant, NEW, Photo Period
Runtz Gluntz Feminized Seeds
Runtz Gluntz won Leafy’s strain of the year in 2020 for it’s candy like sweetness and dense buds that look like they’ve been coated in sugar. Born in Los Angeles, this strain is a cross between Zkittly Zi Zi (winner in 2016 Emerald cup) and Gelato (also legendary for sweet lemony terpenes). Runtz Gluntz has a very high THC content up to 28% and is also capable of producing large crops indoors and outdoors with thick frosty buds and intense aroma with sweet candy like characteristics when consumed.
This strain fits strongly into the heavy hitter category with a long-lasting uplifting and euphoric effect with deep relaxation of the body also suitable for medical purposes. With a fast flowering time around 8-9 weeks and a yield up to 800 g/m2 it’s a candy flavored powerhouse that is sure to please
![]() 70% INDICA – 30% SATIVA
70% INDICA – 30% SATIVA
![]() FEMINIZED & TOP QUALITY
FEMINIZED & TOP QUALITY ![]()
![]() VERY VERY HIGH THC LEVEL 24-28%
VERY VERY HIGH THC LEVEL 24-28%
![]() FAST, DISCREET, DOMESTIC SHIPPING
FAST, DISCREET, DOMESTIC SHIPPING ![]()
SKU: RG
Cannabis Seeds, Exotic Strains, Free Seeds Promo, Highest THC, Indica Dominant, NEW, Photo Period
Watermelon Jam Feminized Seeds
Cannabis Seeds, Exotic Strains, Free Seeds Promo, Highest THC, Indica Dominant, NEW, Photo Period
Watermelon Jam Feminized Seeds
Free Seeds with Every Order (Mention your desired free strain in the comment field at checkout)
Watermelon Jam is a Indica-heavy cannabis connoisseur favorite with a wonderfully fruity terpene profile, strong THC, heavy yielder that is also beginner grower friendly. The origin story is somewhat elusive with it’s lineage tracing back to selected Watermelon genetics. Developed in Europe around 2010, Watermelon Jam is all about taking everything growers and consumers loved (flavour, potency, yield) and turning the dial up a few notches.
Suitable for indoor or outdoor growing, it enjoys semi-humid environments. Yielding up to 950 g/m2 under optimal conditions, this strain has strong lateral branches and is definitely a heavy yielder. This exotic strain will not disappoint for those who like a uniquely fruity, heavy hitting Indica.
![]() 80% INDICA – 20% SATIVA
80% INDICA – 20% SATIVA
![]() FEMINIZED & TOP QUALITY
FEMINIZED & TOP QUALITY ![]()
![]() VERY HIGH THC LEVEL 20-26%
VERY HIGH THC LEVEL 20-26%
![]() FAST, DISCREET, DOMESTIC SHIPPING
FAST, DISCREET, DOMESTIC SHIPPING ![]()
SKU: WJ
Cannabis Seeds, Indica Dominant, Most Popular, ON SALE (20% OFF), Photo Period
Big Bud Feminized (On Sale)
Cannabis Seeds, Indica Dominant, Most Popular, ON SALE (20% OFF), Photo Period
Big Bud Feminized (On Sale)
Big Bud is a famous cannabis strain not only for massive yields, but also for an outstanding pedigree which has been refined over many years. This Indica dominant hybrid has incredible vigor and often record breaking production derived from Afghani Northern Lights with Skunk genetics. The resin profile is very impressive coating even the inner flower clusters and this strain has a powerful yet balanced stone and intense flavor and smell profile with it’s skunk sativa ancestry. On both smaller and large plants, the flowers on a Bigger Bud plant are huge, solid and packed with resin. A very worthy addition to any collection!
![]() 85% INDICA – 15% SATIVA
85% INDICA – 15% SATIVA
![]() FOR SOUVENIR PURPOSES ONLY
FOR SOUVENIR PURPOSES ONLY ![]()
![]() FEMINIZED & TOP QUALITY
FEMINIZED & TOP QUALITY ![]()
![]() VERY HIGH THC LEVEL 17-20%
VERY HIGH THC LEVEL 17-20%
![]() FAST, DISCREET, DOMESTIC SHIPPING
FAST, DISCREET, DOMESTIC SHIPPING ![]()
SKU: BigB
Cannabis Seeds, Free Seeds Promo, Indica Dominant, Photo Period
Cheese Feminized (+ Free Seeds)
Free Seeds with Every Order (Mention your desired free strain in the comment field at checkout)
The Cheese Cannabis Strain is one of the best skunk strains available worldwide and probably the most famous coming out of the UK. With a distinctive and very special taste and aroma this strain will have your mouth watering! With a long lasting flavour and scent of cured cheese this strain leaves a lasting impression of skunk and aged cheddar. As an Indica expect a long lasting slow creeping very ‘stoned’ stone from this classic strain.
This strain is medicinally effective against pain and is often used for medicial purposes. With a flowering time of 8-9 weeks the plants are very high yielding especially for an Indica with 850 g/m2 expected under the right conditions. The plant is medium-large and quite branchy with a vine-like growth with impressively large yet fat chunky flowers. The plant likely will need support outdoors especially given the weight of the flowers.
![]() 60% INDICA – 40% SATIVA
60% INDICA – 40% SATIVA
![]() FOR SOUVENIR PURPOSES ONLY
FOR SOUVENIR PURPOSES ONLY ![]()
![]() FEMINIZED & TOP QUALITY
FEMINIZED & TOP QUALITY ![]()
![]() VERY HIGH THC LEVEL 18-21%
VERY HIGH THC LEVEL 18-21%
![]() FAST, DISCREET, DOMESTIC SHIPPING
FAST, DISCREET, DOMESTIC SHIPPING ![]()
SKU: Cheese
Cannabis Seeds, Indica Dominant, Photo Period
Bubblegum Feminized Seeds
After coming to Holland from USA as a clone-only strain, Bubblegum became an immediate hit across Europe. It has a large bubbly buds and a very powerful effect and can easily surprise those who need emotional and physical relief. This strain has a unique bubble gum smell too due to it’s cross with South Indian x Holland x Blueberry genetics. Its effect is balanced, powerful, physical and cerebral. Initially stimulating and invigorating. A connoisseurs specialty.
![]() 80% INDICA – 20% SATIVA
80% INDICA – 20% SATIVA
![]() FOR SOUVENIR PURPOSES ONLY
FOR SOUVENIR PURPOSES ONLY ![]()
![]() FEMINIZED & TOP QUALITY
FEMINIZED & TOP QUALITY ![]()
![]() VERY HIGH THC LEVEL 20-27%
VERY HIGH THC LEVEL 20-27%
![]() FAST, DISCREET, DOMESTIC SHIPPING
FAST, DISCREET, DOMESTIC SHIPPING ![]()
SKU: BG
Cannabis Seeds, Free Seeds Promo, Indica Dominant, Photo Period
White Widow Feminized (+ Free Seeds)
Free Seeds with Every Order (Mention your desired free strain in the comment field at checkout)
White Widow is quite possibly the most famous Cannabis strain ever. Originally cultivated in the Netherlands, this balanced Indica/Sativa is a cross between Brazilian Sativa Landrace and a special resin enhanced South Indian Indica. WW has been a prominent staple of the Dutch coffeeshops for over 25 years. Our feminized version is very well balanced through selective breeding with only the highest quailty phenotypes. White Widow has brought us many varieites such as White Russian, Blue Widow, and White Rhino, however there is nothing like the first and the best strain, which flowers in 60 days indoors. These are high quality seeds that are sure to impress.
![]() 60% INDICA – 40% SATIVA
60% INDICA – 40% SATIVA
![]() FOR SOUVENIR PURPOSES ONLY
FOR SOUVENIR PURPOSES ONLY ![]()
![]() FEMINIZED & TOP QUALITY
FEMINIZED & TOP QUALITY ![]()
![]() VERY HIGH THC LEVEL 18-21%
VERY HIGH THC LEVEL 18-21%
![]() FAST, DISCREET, DOMESTIC SHIPPING
FAST, DISCREET, DOMESTIC SHIPPING ![]()
SKU: WW

Cannabis Seeds, Indica Dominant, Photo Period
Girl Scout Cookies Feminized
An Aussie favourite, this indica dominant strain is blend of OG Kush and Durban Poison with powerful long lasting, relaxing effects for medicinal purposes to help with nausea and pain. This will will certainly keep you well relaxed for that end of day stress relief! This strain has an intense flavour and aroma of citrus and sweet fruit with above average yields.
![]() 80% INDICA – 20% SATIVA
80% INDICA – 20% SATIVA
![]() FOR SOUVENIR PURPOSES ONLY
FOR SOUVENIR PURPOSES ONLY ![]()
![]() FEMINIZED & TOP QUALITY
FEMINIZED & TOP QUALITY ![]()
![]() VERY HIGH THC LEVEL 18-20%
VERY HIGH THC LEVEL 18-20%
![]() FAST, DISCREET, DOMESTIC SHIPPING
FAST, DISCREET, DOMESTIC SHIPPING ![]()
SKU: GSC
Cannabis Seeds, Free Seeds Promo, Indica Dominant, Photo Period
OG Kush Feminized Seeds (+ Free Seeds)
Cannabis Seeds, Free Seeds Promo, Indica Dominant, Photo Period
OG Kush Feminized Seeds (+ Free Seeds)
Free Seeds with Every Order (Mention your desired free strain in the comment field at checkout)
The classic californian OG Kush loves hot temperature and is the proud parent of many popular strains such as girl scout cookies. OG Kush has very high THC levels and is well known for it’s full body high and spicey aroma.
![]() 75% INDICA – 25% SATIVA
75% INDICA – 25% SATIVA
![]() FOR SOUVENIR PURPOSES ONLY
FOR SOUVENIR PURPOSES ONLY ![]()
![]() FEMINIZED & TOP QUALITY
FEMINIZED & TOP QUALITY ![]()
![]() VERY HIGH THC LEVEL 18-23%
VERY HIGH THC LEVEL 18-23%
![]() FAST, DISCREET, DOMESTIC SHIPPING
FAST, DISCREET, DOMESTIC SHIPPING ![]()
SKU: OG
Cannabis Seeds, Free Seeds Promo, Indica Dominant, Most Popular, Photo Period
Northern Lights Feminized Seeds (+Free Seeds)
Cannabis Seeds, Free Seeds Promo, Indica Dominant, Most Popular, Photo Period
Northern Lights Feminized Seeds (+Free Seeds)
Free Seeds with Every Order (Mention your desired free strain in the comment field at checkout)
Hmmm probably the most famous strain of all time? And for good reason….. A strong Indica praised for its remarkably resinous buds, fast flowering and easy to grow resilience. This strain has been setting the standard for decades! Well worth your attention, these are fast growing high quality seeds with wow factor.
![]() 90% INDICA – 10% SATIVA
90% INDICA – 10% SATIVA
![]() FOR SOUVENIR PURPOSES ONLY
FOR SOUVENIR PURPOSES ONLY ![]()
![]() FEMINIZED & TOP QUALITY
FEMINIZED & TOP QUALITY ![]()
![]() VERY HIGH THC LEVEL 19-24%
VERY HIGH THC LEVEL 19-24%
![]() FAST, DISCREET, DOMESTIC SHIPPING
FAST, DISCREET, DOMESTIC SHIPPING ![]()
SKU: NL
Cannabis Seeds, Indica Dominant, Photo Period
Gelato Feminized Seeds
Fruity Gelato Goodness… This is an amazing strain! Another ‘Cali’ wonder, this strain is a combination of Girl Scout Cookies and Sunset Sherbet with a desert-like sweet taste and super strong potency, this strain is very popular among serious marijuana enthusiasts.
![]() 70% INDICA – 30% SATIVA
70% INDICA – 30% SATIVA
![]() FOR SOUVENIR PURPOSES ONLY
FOR SOUVENIR PURPOSES ONLY ![]()
![]() FEMINIZED & TOP QUALITY
FEMINIZED & TOP QUALITY ![]()
![]() VERY HIGH THC LEVEL 21-25%
VERY HIGH THC LEVEL 21-25%
![]() FAST, DISCREET, DOMESTIC SHIPPING
FAST, DISCREET, DOMESTIC SHIPPING ![]()
SKU: Gelato
Cannabis Seeds, Free Seeds Promo, Highest THC, Indica Dominant, Most Popular, Photo Period
Gorilla Glue Feminized Seeds (+ Free Seeds)
Cannabis Seeds, Free Seeds Promo, Highest THC, Indica Dominant, Most Popular, Photo Period
Gorilla Glue Feminized Seeds (+ Free Seeds)
Guerilla Glue (Gorilla Glue) also known as GG4, is one of the strongest cannabis strains available this one is recommended for the serious marijuana consumer! This highly acclaimed strain has won several cannabis awards like the Michigan and Los Angeles Cannabis Cups in 2014, and the High Times Jamaican World Cup.
This is a very potent indica based hybrid strain is a cross between Sour Dubb, Chem’s Sister and Chocolate Diesel. This strain is a favorite not only for it’s potency but also it’s yielding capability as it delivers huge yields with a strong sugar-frosty trichomes and very sticky buds lending to it’s name. You can expect yields of over 700 g/m2 if grown outdoors. Well worth your attention, this strain certainly delivers.
![]() 60% INDICA – 40% SATIVA
60% INDICA – 40% SATIVA
![]() FOR SOUVENIR PURPOSES ONLY
FOR SOUVENIR PURPOSES ONLY ![]()
![]() FEMINIZED & TOP QUALITY
FEMINIZED & TOP QUALITY ![]()
![]() VERY HIGH THC LEVEL 19-28%
VERY HIGH THC LEVEL 19-28%
![]() FAST, DISCREET, DOMESTIC SHIPPING
FAST, DISCREET, DOMESTIC SHIPPING ![]()
SKU: GG
Product Carousel Tabs
Auto, Cannabis Seeds, Free Seeds Promo, Sativa Dominant
Auto Blue Dream Feminized (+ Free Seeds)
Free Seeds with Every Order (Mention your desired free strain in the comment field at checkout)
Blue Dream has long been an Aussie favorite for it’s balanced Sativa/Indica characteristics leaning towards Sativa dominant. Originating from California, Blue Dream is a cross between Blueberry (Indica) and Haze (Sativa). With a medium-high THC level between 15-21% THC, this strain is very high yielding and easy to grow leading to it’s popularity amongst novice and veteran cannabis growers.
Auto flowering seeds will flower on their own normally after 2-4 weeks of growth without any light schedule alteration, creating compact plants and with a shorter growing period.
As a Sativa dominant, Blue Dream is comparatively quick to grow but will produce larger high yielding plants up to 6 feet tall depending on conditions, with a 8-9 week flowering time and 700+ g/m2. This strain performs well indoors and outdoors with most cultivation methods. With a potent and intense fruity, sweet aroma similar to ripe berries, the high is reported to be creative, happy & euphoric. This strain is also popular with medicinal cannabis users to treat stress, depression and anxiety.
![]() 60% SATIVA – 40% INDICA
60% SATIVA – 40% INDICA
![]() FOR SOUVENIR PURPOSES ONLY
FOR SOUVENIR PURPOSES ONLY ![]()
![]() FEMINIZED & TOP QUALITY
FEMINIZED & TOP QUALITY ![]()
![]() MEDIUM / HIGH THC LEVEL 15-21%
MEDIUM / HIGH THC LEVEL 15-21%
![]() FAST, DISCREET, DOMESTIC SHIPPING
FAST, DISCREET, DOMESTIC SHIPPING ![]()
SKU: BlueDA
Auto, Cannabis Seeds, Multi pack, Sativa Dominant
Multi Pack 10 AUTO Sativa Feminized Seeds
This multi-pack includes 4 of our top feminized AUTO Sativa strains (10+1 seeds total). Hand picked and top quality for your souvenir collection. We’ll ensure you receive up to 4 different feminized strains normally made up of a 3 x 3 x 3 x 2 (11 total) mixture of our most popular strains which may include AUTO Bruce Banner, AUTO Gorilla Glue, AUTO Amensia Haze, AUTO AK-47, AUTO Cocopopo
Auto flowering seeds will flower on their own normally after 2-4 weeks of growth without any light schedule alteration, creating compact plants and with a shorter growing period.
![]() SATIVA DOMINANT (AUTO FLOWERING)
SATIVA DOMINANT (AUTO FLOWERING)
![]() FOR SOUVENIR PURPOSES ONLY
FOR SOUVENIR PURPOSES ONLY ![]()
![]() FEMINIZED & TOP QUALITY
FEMINIZED & TOP QUALITY ![]()
![]() HIGH THC LEVEL
HIGH THC LEVEL
![]() FAST, DISCREET, DOMESTIC SHIPPING
FAST, DISCREET, DOMESTIC SHIPPING ![]()
SKU: n/a
Auto, Cannabis Seeds, Sativa Dominant
Auto Cocopopo Feminized
Here is a rare auto choco strain that will please the true connoisseurs and collectors. The distinctive sweet-bitter characteristics of the original Chocolope strain has been preserved in this high yielding autoflower variety.
The genetics are Cocopopo x Ruderalis which provide an intense aroma and unique flavour of deep notes of chocolate. As a prodominant Sativa strain the effects are uplifting, invigorating and euphoria-producing. The flower time is approx 9-10 weeks yielding between 450-600 g/m2 indoors. Outdoors it will reach a tall height of 70-140cm with a harvest normally after approx 80-90 days assuming the temp stays above 10 degrees celcius. This strain is definately a bit left of centre but well worth your attention!
![]() 75% SATIVA – 5% INDICA – 20% RUDERALIS
75% SATIVA – 5% INDICA – 20% RUDERALIS
![]() FOR SOUVENIR PURPOSES ONLY
FOR SOUVENIR PURPOSES ONLY ![]()
![]() FEMINIZED & TOP QUALITY
FEMINIZED & TOP QUALITY ![]()
![]() VERY HIGH THC LEVEL 20-25%
VERY HIGH THC LEVEL 20-25%
![]() FAST, DISCREET, DOMESTIC SHIPPING
FAST, DISCREET, DOMESTIC SHIPPING ![]()
SKU: coco
Auto, Cannabis Seeds, Free Seeds Promo, Highest THC, Most Popular, Sativa Dominant
Auto Bruce Banner #5 Feminized (+ Free Seeds)
Auto, Cannabis Seeds, Free Seeds Promo, Highest THC, Most Popular, Sativa Dominant
Auto Bruce Banner #5 Feminized (+ Free Seeds)
Free Seeds with Every Order (Mention your desired free strain in the comment field at checkout)
The iconic Autoflowering Bruce Banner #5 is now available in Australia! This strain is super easy to grow and offers very heavy yielding plants with thick, intense diesel flavoured fruity buds. As an Autoflower, the plant is medium-sized and performs well indoors and outdoors with any of the available cultivation methods.
Auto flowering seeds will flower on their own normally after 2-4 weeks of growth without any light schedule alteration, creating compact plants and with a shorter growing period.
Bruce Banner has a massive cult following over many years with a flavour posessing distinct earthy wood with sweet strawberry undertones. As a Sativa dominant, this strain is highly energising and great for daytime motivation and creativity. Expect a flowering time of 7-8 weeks with a yield of 500 g/m2 and plant height of 80-120cm with flowing at any photoperiod between 12-18 hours so long as the temperature is above 10°C absolute min.
![]() 55% SATIVA – 25% INDICA – 20% RUDERALIS
55% SATIVA – 25% INDICA – 20% RUDERALIS
![]() FOR SOUVENIR PURPOSES ONLY
FOR SOUVENIR PURPOSES ONLY ![]()
![]() FEMINIZED & TOP QUALITY
FEMINIZED & TOP QUALITY ![]()
![]() VERY HIGH THC LEVEL 23%
VERY HIGH THC LEVEL 23%
![]() FAST, DISCREET, DOMESTIC SHIPPING
FAST, DISCREET, DOMESTIC SHIPPING ![]()
SKU: BBA
Auto, Cannabis Seeds, Free Seeds Promo, Highest THC, Most Popular, Sativa Dominant
Auto Gorilla Glue Feminized Seeds (+ Free Seeds)
Auto, Cannabis Seeds, Free Seeds Promo, Highest THC, Most Popular, Sativa Dominant
Auto Gorilla Glue Feminized Seeds (+ Free Seeds)
Free Seeds with Every Order (Mention your desired free strain in the comment field at checkout)
One of the strongest cannabis strains available this one is recommended for the serious marijuana consumer! This popular strain has also won several cannabis awards like the Michigan and Los Angeles Cannabis Cups in 2014, and the High Times Jamaican World Cup.
Auto flowering seeds will flower on their own normally after 2-4 weeks of growth without any light schedule alteration, creating compact plants and with a shorter growing period.
![]() 50% INDICA – 50% SATIVA
50% INDICA – 50% SATIVA
![]() FOR SOUVENIR PURPOSES ONLY
FOR SOUVENIR PURPOSES ONLY ![]()
![]() FEMINIZED & TOP QUALITY
FEMINIZED & TOP QUALITY ![]()
![]() VERY HIGH THC LEVEL 19-24%
VERY HIGH THC LEVEL 19-24%
![]() FAST, DISCREET, DOMESTIC SHIPPING
FAST, DISCREET, DOMESTIC SHIPPING ![]()
SKU: GGA
Auto, Cannabis Seeds, Sativa Dominant
Auto Amnesia Haze Feminized
The Dutch classic! This Sativa dominent strain has won several cannabis cups over the years and is charicterized by mouth watering notes of lemon, incense and cedarwood with a very uplifting & stimulating high. This Sativa has a longer flowering time but the patient grower will be rewarded with a truly supreme quality outstanding end product.
Auto flowering seeds will flower on their own normally after 2-4 weeks of growth without any light schedule alteration, creating compact plants and with a shorter growing period.
![]() 10% INDICA – 90% SATIVA
10% INDICA – 90% SATIVA
![]() FOR SOUVENIR PURPOSES ONLY
FOR SOUVENIR PURPOSES ONLY ![]()
![]() FEMINIZED & TOP QUALITY
FEMINIZED & TOP QUALITY ![]()
![]() VERY HIGH THC LEVEL 21-25%
VERY HIGH THC LEVEL 21-25%
![]() FAST, DISCREET, DOMESTIC SHIPPING
FAST, DISCREET, DOMESTIC SHIPPING ![]()
SKU: AHA
Auto, Cannabis Seeds, Free Seeds Promo, Highest THC, Sativa Dominant
Auto AK-47 Feminized Seeds (+ Free Seeds)
Auto, Cannabis Seeds, Free Seeds Promo, Highest THC, Sativa Dominant
Auto AK-47 Feminized Seeds (+ Free Seeds)
Free Seeds with Every Order (Mention your desired free strain in the comment field at checkout)
Ak-47 was orginally created by the Netherland’s Serious Seeds in 1992 and has won 16 awards including the High Times Cannabis Cup. People love this strain around the world for its high THC content, strong flavour and high energy effects.
Auto flowering seeds will flower on their own normally after 2-4 weeks of growth without any light schedule alteration, creating compact plants and with a shorter growing period.
![]() 20% INDICA – 80% SATIVA
20% INDICA – 80% SATIVA
![]() FOR SOUVENIR PURPOSES ONLY
FOR SOUVENIR PURPOSES ONLY ![]()
![]() FEMINIZED & TOP QUALITY
FEMINIZED & TOP QUALITY ![]()
![]() VERY HIGH THC LEVEL 18-23%
VERY HIGH THC LEVEL 18-23%
![]() FAST, DISCREET, DOMESTIC SHIPPING
FAST, DISCREET, DOMESTIC SHIPPING ![]()
SKU: AKA
Cannabis Seeds, Exotic Strains, Highest THC, Most Popular, NEW, Photo Period, Sativa Dominant
Mimosa Famosa Feminized Seeds
Cannabis Seeds, Exotic Strains, Highest THC, Most Popular, NEW, Photo Period, Sativa Dominant
Mimosa Famosa Feminized Seeds
Mimosa Famosa, is the upgraded version of the popular ‘Mimosa’ or ‘Purple Mimosa’ which is consistently one of the most potent THC strains around. The ‘Famosa’ version has even higher THC and more intense terpenes. While this strain packs a serious punch, it’s sativa dominant hybrid genetics offer a vibrant, uplifting even talkative high. The flavor of this strain is sour & citrusy with earthy pine notes and a smooth finish.
This strain has been expertly crafted by crossing 2 amazing strains ‘Clementine’ and ‘Purple Punch so the finish can have a nice purple hue and the yield is huge up to 1000 g/m2 with a 9-10 week flowering time indoors. This strain has long branches and tends to be quite bush especially if grown outdoors.
![]() 30% INDICA – 70% SATIVA
30% INDICA – 70% SATIVA
![]() FEMINIZED & TOP QUALITY
FEMINIZED & TOP QUALITY ![]()
![]() VERY VERY! HIGH THC LEVEL 25-33%
VERY VERY! HIGH THC LEVEL 25-33%
![]() FAST, DISCREET, DOMESTIC SHIPPING
FAST, DISCREET, DOMESTIC SHIPPING ![]()
SKU: MF
ON SALE (20% OFF), Photo Period, Sativa Dominant
Amnesia Haze Feminized (On sale)
The Dutch classic! This world famous Sativa dominant strain has won several cannabis cups over the years and is characterized by mouth watering notes of lemon, incense and cedarwood with a very uplifting & stimulating high. This Sativa has a longer flowering time but the patient grower will be rewarded with a truly supreme quality outstanding end product.
This strain is loved for its energetic daytime high, creative spark and old-school Amsterdam pedigree.
![]() 10% INDICA – 90% SATIVA
10% INDICA – 90% SATIVA
![]() FEMINIZED & TOP QUALITY
FEMINIZED & TOP QUALITY ![]()
![]() VERY HIGH THC LEVEL 21-25%
VERY HIGH THC LEVEL 21-25%
![]() FAST, DISCREET, DOMESTIC SHIPPING
FAST, DISCREET, DOMESTIC SHIPPING ![]()
SKU: AH
Cannabis Seeds, Free Seeds Promo, Photo Period, Sativa Dominant
Purple Haze Feminized (+ Free Seeds)
Free Seeds with Every Order (Mention your desired free strain in the comment field at checkout)
Purple Haze was made famous in the 60’s by the Rockstar legend Jimi Hendrix’s. With a 60% sativa and 40% indica blend, this incredibly popular strain originated from Thailand as a cross between Haze & Purple Thai. Strong enough to pack a good punch, but not too crazy, this strain delivers a creative and euphoric high with a pleasant flavour of grape, berry and lavender.
Growing Purple Haze is a straight forward with plants thriving both indoors and outdoors with large yields of 600+m p/2. The plants will reach a medium height, with a distinct purple hue of the flowers when fresh, dulling to a slight purple once dried with a wonderful smell. As this variety has been cultivated for many many years, you can be assured of a stable phenotype that is derived only from the best genetic offerings available today.
![]() 60% SATIVA – 40% INDICA
60% SATIVA – 40% INDICA
![]() FOR SOUVENIR PURPOSES ONLY
FOR SOUVENIR PURPOSES ONLY ![]()
![]() FEMINIZED & TOP QUALITY
FEMINIZED & TOP QUALITY ![]()
![]() MEDIUM / HIGH THC LEVEL 14-19%
MEDIUM / HIGH THC LEVEL 14-19%
![]() FAST, DISCREET, DOMESTIC SHIPPING
FAST, DISCREET, DOMESTIC SHIPPING ![]()
SKU: PH
Cannabis Seeds, Free Seeds Promo, Photo Period, Sativa Dominant
Blue Dream Feminized (+ Free Seeds)
Free Seeds with Every Order (Mention your desired free strain in the comment field at checkout)
Blue Dream has long been an Aussie favorite for it’s balanced Sativa/Indica characteristics leaning towards Sativa dominant. Originating from California, Blue Dream is a cross between Blueberry (Indica) and Haze (Sativa). With a medium-high THC level between 15-21% THC, this strain is very high yielding and easy to grow leading to it’s popularity amongst novice and veteran cannabis growers.
As a Sativa dominant, Blue Dream is comparatively quick to grow but will produce larger high yielding plants up to 6 feet tall depending on conditions, with a 8-9 week flowering time and 700+ g/m2. This strain performs well indoors and outdoors with most cultivation methods. With a potent and intense fruity, sweet aroma similar to ripe berries, the high is reported to be creative, happy & euphoric. This strain is also popular with medicinal cannabis users to treat stress, depression and anxiety.
![]() 60% SATIVA – 40% INDICA
60% SATIVA – 40% INDICA
![]() FOR SOUVENIR PURPOSES ONLY
FOR SOUVENIR PURPOSES ONLY ![]()
![]() FEMINIZED & TOP QUALITY
FEMINIZED & TOP QUALITY ![]()
![]() MEDIUM / HIGH THC LEVEL 15-21%
MEDIUM / HIGH THC LEVEL 15-21%
![]() FAST, DISCREET, DOMESTIC SHIPPING
FAST, DISCREET, DOMESTIC SHIPPING ![]()
SKU: BlueD
Cannabis Seeds, Exotic Strains, ON SALE (20% OFF), Photo Period, Sativa Dominant
Lemon Skunk Feminized (On Sale)
Cannabis Seeds, Exotic Strains, ON SALE (20% OFF), Photo Period, Sativa Dominant
Lemon Skunk Feminized (On Sale)
Lemon Skunk has several first place awards with it’s unique scent, taste and high making it a cannabis connoisseur specialty. Lemon Skunk is a cross between two skunk strains, Skunk #1 and Citris Skunk. Scoring a first place award during the High Life Cup in 2007 and others, this potent strain has complex lemon grass, lemon, orange, cedarwood flavors.
Lemon Skunk grows well in both indoor and outdoor conditions but grows quite large so make sure you have a big space. The flowering time is normally 7-9 weeks with the buds often containing patches of golden oranges with medium size leaves.
Many reviewers describe the Lemon Skunk high as introspection, long lasting and creative. This is a great strain for breeders of all levels you will not be disappointed.
![]() 60% SATIVA – 40% INDICA
60% SATIVA – 40% INDICA
![]() FOR SOUVENIR PURPOSES ONLY
FOR SOUVENIR PURPOSES ONLY ![]()
![]() FEMINIZED & TOP QUALITY
FEMINIZED & TOP QUALITY ![]()
![]() HIGH THC LEVEL 14-22%
HIGH THC LEVEL 14-22%
![]() FAST, DISCREET, DOMESTIC SHIPPING
FAST, DISCREET, DOMESTIC SHIPPING ![]()
SKU: LS
Cannabis Seeds, Free Seeds Promo, Highest THC, Most Popular, Photo Period, Sativa Dominant
Bruce Banner #5 Feminized (+ Free Seeds)
Cannabis Seeds, Free Seeds Promo, Highest THC, Most Popular, Photo Period, Sativa Dominant
Bruce Banner #5 Feminized (+ Free Seeds)
Free Seeds with Every Order (Mention your desired free strain in the comment field at checkout)
The iconic cult classic ultra high THC Bruce Banner #5 is available in Australia! This strain is super easy to grow and offers very heavy yielding plants with thick, intense diesel flavoured fruity buds. As a Sativa dominent, expect larger plants, quite tall with long bushy stems with heavy yields. This strain performs well indoors and outdoors with any of the available cultivation methods.
Bruce Banner has a massive cult following over many years with a flavour posessing distinct earthy wood with sweet strawberry undertones. As a Sativa dominant, this strain with a mix of OG Kush + Strawberry Punch Diesel is highly energising and great for daytime motivation and creativity. Expect a flowering time of 9-11 weeks with a yield of 700 g/m2 and plant height of 150cm with flowing so long as the temperature is above 15°C absolute min.
![]() 65% SATIVA – 35% INDICA
65% SATIVA – 35% INDICA
![]() FOR SOUVENIR PURPOSES ONLY
FOR SOUVENIR PURPOSES ONLY ![]()
![]() FEMINIZED & TOP QUALITY
FEMINIZED & TOP QUALITY ![]()
![]() VERY VERY HIGH THC LEVEL 29%
VERY VERY HIGH THC LEVEL 29%
![]() FAST, DISCREET, DOMESTIC SHIPPING
FAST, DISCREET, DOMESTIC SHIPPING ![]()
SKU: BB
Cannabis Seeds, Exotic Strains, Photo Period, Sativa Dominant
Grapefruit Feminized Seeds
The Vancouver, Canada born strain known and loved for decades is a real uplifter! This 80% Sativa strain has a sweet and fruity aroma similar to the smell of ripe grapefruit It’s an 80’s old secret mix of Cinderalla 99 with a mystical grapefruit flavoured Sativa. With the smell of pineapple and grapefuit this has an uplifting & stimulating high good for focus, creativity and pleasure.
![]() 20% INDICA – 80% SATIVA
20% INDICA – 80% SATIVA
![]() FOR SOUVENIR PURPOSES ONLY
FOR SOUVENIR PURPOSES ONLY ![]()
![]() FEMINIZED & TOP QUALITY
FEMINIZED & TOP QUALITY ![]()
![]() HIGH THC LEVEL 16-18%
HIGH THC LEVEL 16-18%
![]() FAST, DISCREET, DOMESTIC SHIPPING
FAST, DISCREET, DOMESTIC SHIPPING ![]()
SKU: GF
Cannabis Seeds, Photo Period, Sativa Dominant
Sour Diesel Feminized Seeds
Sour D, is renown across North America for it’s very strong sativa dominated effects and unique diesel fuel odour when smoked. Around since the 90s, it was created by crossing Chemdawg and Super Skunk. Sour Diesel has an intense flavour and aroma, with notes of lemon, exotic wood, diesel fuel and spices.
![]() 40% INDICA – 60% SATIVA
40% INDICA – 60% SATIVA
![]() FOR SOUVENIR PURPOSES ONLY
FOR SOUVENIR PURPOSES ONLY ![]()
![]() FEMINIZED & TOP QUALITY
FEMINIZED & TOP QUALITY ![]()
![]() VERY HIGH THC LEVEL 19-24%
VERY HIGH THC LEVEL 19-24%
![]() FAST, DISCREET, DOMESTIC SHIPPING
FAST, DISCREET, DOMESTIC SHIPPING ![]()
SKU: SD
Cannabis Seeds, Free Seeds Promo, Highest THC, Photo Period, Sativa Dominant
AK-47 Feminized Seeds (+Free Seeds)
Cannabis Seeds, Free Seeds Promo, Highest THC, Photo Period, Sativa Dominant
AK-47 Feminized Seeds (+Free Seeds)
Free Seeds with Every Order (Mention your desired free strain in the comment field at checkout)
Ak-47 was orginally created by the Netherland’s Serious Seeds in 1992 and has won 16 awards including the High Times Cannabis Cup. People love this strain around the world for its high THC content, strong flavour and high energy effects.
![]() 20% INDICA – 80% SATIVA
20% INDICA – 80% SATIVA
![]() FOR SOUVENIR PURPOSES ONLY
FOR SOUVENIR PURPOSES ONLY ![]()
![]() FEMINIZED & TOP QUALITY
FEMINIZED & TOP QUALITY ![]()
![]() VERY HIGH THC LEVEL 18-23%
VERY HIGH THC LEVEL 18-23%
![]() FAST, DISCREET, DOMESTIC SHIPPING
FAST, DISCREET, DOMESTIC SHIPPING ![]()
SKU: AK
Cannabis Seeds, Exotic Strains, Highest THC, Indica Dominant, NEW, Photo Period
Runtz Gluntz Feminized Seeds
Cannabis Seeds, Exotic Strains, Highest THC, Indica Dominant, NEW, Photo Period
Runtz Gluntz Feminized Seeds
Runtz Gluntz won Leafy’s strain of the year in 2020 for it’s candy like sweetness and dense buds that look like they’ve been coated in sugar. Born in Los Angeles, this strain is a cross between Zkittly Zi Zi (winner in 2016 Emerald cup) and Gelato (also legendary for sweet lemony terpenes). Runtz Gluntz has a very high THC content up to 28% and is also capable of producing large crops indoors and outdoors with thick frosty buds and intense aroma with sweet candy like characteristics when consumed.
This strain fits strongly into the heavy hitter category with a long-lasting uplifting and euphoric effect with deep relaxation of the body also suitable for medical purposes. With a fast flowering time around 8-9 weeks and a yield up to 800 g/m2 it’s a candy flavored powerhouse that is sure to please
![]() 70% INDICA – 30% SATIVA
70% INDICA – 30% SATIVA
![]() FEMINIZED & TOP QUALITY
FEMINIZED & TOP QUALITY ![]()
![]() VERY VERY HIGH THC LEVEL 24-28%
VERY VERY HIGH THC LEVEL 24-28%
![]() FAST, DISCREET, DOMESTIC SHIPPING
FAST, DISCREET, DOMESTIC SHIPPING ![]()
SKU: RG
Cannabis Seeds, Exotic Strains, Free Seeds Promo, Highest THC, Indica Dominant, NEW, Photo Period
Watermelon Jam Feminized Seeds
Cannabis Seeds, Exotic Strains, Free Seeds Promo, Highest THC, Indica Dominant, NEW, Photo Period
Watermelon Jam Feminized Seeds
Free Seeds with Every Order (Mention your desired free strain in the comment field at checkout)
Watermelon Jam is a Indica-heavy cannabis connoisseur favorite with a wonderfully fruity terpene profile, strong THC, heavy yielder that is also beginner grower friendly. The origin story is somewhat elusive with it’s lineage tracing back to selected Watermelon genetics. Developed in Europe around 2010, Watermelon Jam is all about taking everything growers and consumers loved (flavour, potency, yield) and turning the dial up a few notches.
Suitable for indoor or outdoor growing, it enjoys semi-humid environments. Yielding up to 950 g/m2 under optimal conditions, this strain has strong lateral branches and is definitely a heavy yielder. This exotic strain will not disappoint for those who like a uniquely fruity, heavy hitting Indica.
![]() 80% INDICA – 20% SATIVA
80% INDICA – 20% SATIVA
![]() FEMINIZED & TOP QUALITY
FEMINIZED & TOP QUALITY ![]()
![]() VERY HIGH THC LEVEL 20-26%
VERY HIGH THC LEVEL 20-26%
![]() FAST, DISCREET, DOMESTIC SHIPPING
FAST, DISCREET, DOMESTIC SHIPPING ![]()
SKU: WJ
Cannabis Seeds, Indica Dominant, Most Popular, ON SALE (20% OFF), Photo Period
Big Bud Feminized (On Sale)
Cannabis Seeds, Indica Dominant, Most Popular, ON SALE (20% OFF), Photo Period
Big Bud Feminized (On Sale)
Big Bud is a famous cannabis strain not only for massive yields, but also for an outstanding pedigree which has been refined over many years. This Indica dominant hybrid has incredible vigor and often record breaking production derived from Afghani Northern Lights with Skunk genetics. The resin profile is very impressive coating even the inner flower clusters and this strain has a powerful yet balanced stone and intense flavor and smell profile with it’s skunk sativa ancestry. On both smaller and large plants, the flowers on a Bigger Bud plant are huge, solid and packed with resin. A very worthy addition to any collection!
![]() 85% INDICA – 15% SATIVA
85% INDICA – 15% SATIVA
![]() FOR SOUVENIR PURPOSES ONLY
FOR SOUVENIR PURPOSES ONLY ![]()
![]() FEMINIZED & TOP QUALITY
FEMINIZED & TOP QUALITY ![]()
![]() VERY HIGH THC LEVEL 17-20%
VERY HIGH THC LEVEL 17-20%
![]() FAST, DISCREET, DOMESTIC SHIPPING
FAST, DISCREET, DOMESTIC SHIPPING ![]()
SKU: BigB
Cannabis Seeds, Free Seeds Promo, Indica Dominant, Photo Period
Cheese Feminized (+ Free Seeds)
Free Seeds with Every Order (Mention your desired free strain in the comment field at checkout)
The Cheese Cannabis Strain is one of the best skunk strains available worldwide and probably the most famous coming out of the UK. With a distinctive and very special taste and aroma this strain will have your mouth watering! With a long lasting flavour and scent of cured cheese this strain leaves a lasting impression of skunk and aged cheddar. As an Indica expect a long lasting slow creeping very ‘stoned’ stone from this classic strain.
This strain is medicinally effective against pain and is often used for medicial purposes. With a flowering time of 8-9 weeks the plants are very high yielding especially for an Indica with 850 g/m2 expected under the right conditions. The plant is medium-large and quite branchy with a vine-like growth with impressively large yet fat chunky flowers. The plant likely will need support outdoors especially given the weight of the flowers.
![]() 60% INDICA – 40% SATIVA
60% INDICA – 40% SATIVA
![]() FOR SOUVENIR PURPOSES ONLY
FOR SOUVENIR PURPOSES ONLY ![]()
![]() FEMINIZED & TOP QUALITY
FEMINIZED & TOP QUALITY ![]()
![]() VERY HIGH THC LEVEL 18-21%
VERY HIGH THC LEVEL 18-21%
![]() FAST, DISCREET, DOMESTIC SHIPPING
FAST, DISCREET, DOMESTIC SHIPPING ![]()
SKU: Cheese
Cannabis Seeds, Indica Dominant, Photo Period
Bubblegum Feminized Seeds
After coming to Holland from USA as a clone-only strain, Bubblegum became an immediate hit across Europe. It has a large bubbly buds and a very powerful effect and can easily surprise those who need emotional and physical relief. This strain has a unique bubble gum smell too due to it’s cross with South Indian x Holland x Blueberry genetics. Its effect is balanced, powerful, physical and cerebral. Initially stimulating and invigorating. A connoisseurs specialty.
![]() 80% INDICA – 20% SATIVA
80% INDICA – 20% SATIVA
![]() FOR SOUVENIR PURPOSES ONLY
FOR SOUVENIR PURPOSES ONLY ![]()
![]() FEMINIZED & TOP QUALITY
FEMINIZED & TOP QUALITY ![]()
![]() VERY HIGH THC LEVEL 20-27%
VERY HIGH THC LEVEL 20-27%
![]() FAST, DISCREET, DOMESTIC SHIPPING
FAST, DISCREET, DOMESTIC SHIPPING ![]()
SKU: BG
Cannabis Seeds, Free Seeds Promo, Indica Dominant, Photo Period
White Widow Feminized (+ Free Seeds)
Free Seeds with Every Order (Mention your desired free strain in the comment field at checkout)
White Widow is quite possibly the most famous Cannabis strain ever. Originally cultivated in the Netherlands, this balanced Indica/Sativa is a cross between Brazilian Sativa Landrace and a special resin enhanced South Indian Indica. WW has been a prominent staple of the Dutch coffeeshops for over 25 years. Our feminized version is very well balanced through selective breeding with only the highest quailty phenotypes. White Widow has brought us many varieites such as White Russian, Blue Widow, and White Rhino, however there is nothing like the first and the best strain, which flowers in 60 days indoors. These are high quality seeds that are sure to impress.
![]() 60% INDICA – 40% SATIVA
60% INDICA – 40% SATIVA
![]() FOR SOUVENIR PURPOSES ONLY
FOR SOUVENIR PURPOSES ONLY ![]()
![]() FEMINIZED & TOP QUALITY
FEMINIZED & TOP QUALITY ![]()
![]() VERY HIGH THC LEVEL 18-21%
VERY HIGH THC LEVEL 18-21%
![]() FAST, DISCREET, DOMESTIC SHIPPING
FAST, DISCREET, DOMESTIC SHIPPING ![]()
SKU: WW
Cannabis Seeds, Indica Dominant, Photo Period
Girl Scout Cookies Feminized
An Aussie favourite, this indica dominant strain is blend of OG Kush and Durban Poison with powerful long lasting, relaxing effects for medicinal purposes to help with nausea and pain. This will will certainly keep you well relaxed for that end of day stress relief! This strain has an intense flavour and aroma of citrus and sweet fruit with above average yields.
![]() 80% INDICA – 20% SATIVA
80% INDICA – 20% SATIVA
![]() FOR SOUVENIR PURPOSES ONLY
FOR SOUVENIR PURPOSES ONLY ![]()
![]() FEMINIZED & TOP QUALITY
FEMINIZED & TOP QUALITY ![]()
![]() VERY HIGH THC LEVEL 18-20%
VERY HIGH THC LEVEL 18-20%
![]() FAST, DISCREET, DOMESTIC SHIPPING
FAST, DISCREET, DOMESTIC SHIPPING ![]()
SKU: GSC
Cannabis Seeds, Free Seeds Promo, Indica Dominant, Photo Period
OG Kush Feminized Seeds (+ Free Seeds)
Cannabis Seeds, Free Seeds Promo, Indica Dominant, Photo Period
OG Kush Feminized Seeds (+ Free Seeds)
Free Seeds with Every Order (Mention your desired free strain in the comment field at checkout)
The classic californian OG Kush loves hot temperature and is the proud parent of many popular strains such as girl scout cookies. OG Kush has very high THC levels and is well known for it’s full body high and spicey aroma.
![]() 75% INDICA – 25% SATIVA
75% INDICA – 25% SATIVA
![]() FOR SOUVENIR PURPOSES ONLY
FOR SOUVENIR PURPOSES ONLY ![]()
![]() FEMINIZED & TOP QUALITY
FEMINIZED & TOP QUALITY ![]()
![]() VERY HIGH THC LEVEL 18-23%
VERY HIGH THC LEVEL 18-23%
![]() FAST, DISCREET, DOMESTIC SHIPPING
FAST, DISCREET, DOMESTIC SHIPPING ![]()
SKU: OG
Cannabis Seeds, Free Seeds Promo, Indica Dominant, Most Popular, Photo Period
Northern Lights Feminized Seeds (+Free Seeds)
Cannabis Seeds, Free Seeds Promo, Indica Dominant, Most Popular, Photo Period
Northern Lights Feminized Seeds (+Free Seeds)
Free Seeds with Every Order (Mention your desired free strain in the comment field at checkout)
Hmmm probably the most famous strain of all time? And for good reason….. A strong Indica praised for its remarkably resinous buds, fast flowering and easy to grow resilience. This strain has been setting the standard for decades! Well worth your attention, these are fast growing high quality seeds with wow factor.
![]() 90% INDICA – 10% SATIVA
90% INDICA – 10% SATIVA
![]() FOR SOUVENIR PURPOSES ONLY
FOR SOUVENIR PURPOSES ONLY ![]()
![]() FEMINIZED & TOP QUALITY
FEMINIZED & TOP QUALITY ![]()
![]() VERY HIGH THC LEVEL 19-24%
VERY HIGH THC LEVEL 19-24%
![]() FAST, DISCREET, DOMESTIC SHIPPING
FAST, DISCREET, DOMESTIC SHIPPING ![]()
SKU: NL
Cannabis Seeds, Indica Dominant, Photo Period
Gelato Feminized Seeds
Fruity Gelato Goodness… This is an amazing strain! Another ‘Cali’ wonder, this strain is a combination of Girl Scout Cookies and Sunset Sherbet with a desert-like sweet taste and super strong potency, this strain is very popular among serious marijuana enthusiasts.
![]() 70% INDICA – 30% SATIVA
70% INDICA – 30% SATIVA
![]() FOR SOUVENIR PURPOSES ONLY
FOR SOUVENIR PURPOSES ONLY ![]()
![]() FEMINIZED & TOP QUALITY
FEMINIZED & TOP QUALITY ![]()
![]() VERY HIGH THC LEVEL 21-25%
VERY HIGH THC LEVEL 21-25%
![]() FAST, DISCREET, DOMESTIC SHIPPING
FAST, DISCREET, DOMESTIC SHIPPING ![]()
SKU: Gelato
Cannabis Seeds, Free Seeds Promo, Highest THC, Indica Dominant, Most Popular, Photo Period
Gorilla Glue Feminized Seeds (+ Free Seeds)
Cannabis Seeds, Free Seeds Promo, Highest THC, Indica Dominant, Most Popular, Photo Period
Gorilla Glue Feminized Seeds (+ Free Seeds)
Guerilla Glue (Gorilla Glue) also known as GG4, is one of the strongest cannabis strains available this one is recommended for the serious marijuana consumer! This highly acclaimed strain has won several cannabis awards like the Michigan and Los Angeles Cannabis Cups in 2014, and the High Times Jamaican World Cup.
This is a very potent indica based hybrid strain is a cross between Sour Dubb, Chem’s Sister and Chocolate Diesel. This strain is a favorite not only for it’s potency but also it’s yielding capability as it delivers huge yields with a strong sugar-frosty trichomes and very sticky buds lending to it’s name. You can expect yields of over 700 g/m2 if grown outdoors. Well worth your attention, this strain certainly delivers.
![]() 60% INDICA – 40% SATIVA
60% INDICA – 40% SATIVA
![]() FOR SOUVENIR PURPOSES ONLY
FOR SOUVENIR PURPOSES ONLY ![]()
![]() FEMINIZED & TOP QUALITY
FEMINIZED & TOP QUALITY ![]()
![]() VERY HIGH THC LEVEL 19-28%
VERY HIGH THC LEVEL 19-28%
![]() FAST, DISCREET, DOMESTIC SHIPPING
FAST, DISCREET, DOMESTIC SHIPPING ![]()
SKU: GG
Auto, Cannabis Seeds, Indica Dominant, Multi pack
Multi Pack 10 AUTO Indica Feminized Seeds
This multi-pack includes 4 of our top feminized Indica strains (10+1 seeds total). Hand picked and top quality for your souvenir collection. We’ll ensure you receive up to 4 different feminized strains normally made up of a 3 x 3 x 3 x 2 (11 total) mixture of our most popular strains which may include AUTO Northern Lights, AUTO White Widow, AUTO Gelato, AUTO Blueberry, AUTO Bubblegum, AUTO Cocopopo
Auto flowering seeds will flower on their own normally after 2-4 weeks of growth without any light schedule alteration, creating compact plants and with a shorter growing period.
![]() INDICA DOMINANT (Auto Flowering)
INDICA DOMINANT (Auto Flowering)
![]() FOR SOUVENIR PURPOSES ONLY
FOR SOUVENIR PURPOSES ONLY ![]()
![]() FEMINIZED & TOP QUALITY
FEMINIZED & TOP QUALITY ![]()
![]() HIGH THC LEVEL
HIGH THC LEVEL
![]() FAST, DISCREET, DOMESTIC SHIPPING
FAST, DISCREET, DOMESTIC SHIPPING ![]()
SKU: n/a
Auto, Cannabis Seeds, Free Seeds Promo, Indica Dominant
Auto White Widow Feminized (+ Free Seeds)
Free Seeds with Every Order (Mention your desired free strain in the comment field at checkout)
White Widow is quite possibly the most famous Cannabis strain ever. Originally cultivated in the Netherlands, this balanced Indica/Sativa is a cross between Brazilian Sativa Landrace and a special resin enhanced South Indian Indica. WW has been a prominent staple of the Dutch coffeeshops for over 25 years. Our feminized version is very well balanced through selective breeding with only the highest quailty phenotypes. White Widow has brought us many varieites such as White Russian, Blue Widow, and White Rhino, however there is nothing like the first and the best strain, which flowers in 60 days indoors. These are high quality seeds that are sure to impress.
Auto flowering seeds will flower on their own normally after 2-4 weeks of growth without any light schedule alteration, creating compact plants and with a shorter growing period.
![]() 60% INDICA – 40% SATIVA
60% INDICA – 40% SATIVA
![]() FOR SOUVENIR PURPOSES ONLY
FOR SOUVENIR PURPOSES ONLY ![]()
![]() FEMINIZED & TOP QUALITY
FEMINIZED & TOP QUALITY ![]()
![]() VERY HIGH THC LEVEL 18-21%
VERY HIGH THC LEVEL 18-21%
![]() FAST, DISCREET, DOMESTIC SHIPPING
FAST, DISCREET, DOMESTIC SHIPPING ![]()
SKU: WWA
Auto, Cannabis Seeds, Free Seeds Promo, Highest THC, Indica Dominant
Auto Gelato Feminized Seeds (+ Free Seeds)
Auto, Cannabis Seeds, Free Seeds Promo, Highest THC, Indica Dominant
Auto Gelato Feminized Seeds (+ Free Seeds)
Free Seeds with Every Order (Mention your desired free strain in the comment field at checkout)
Fruity Gelato Goodness… This is an amazing strain! Another ‘Cali’ wonder, this strain is a combination of Girl Scout Cookies and Sunset Sherbet with a desert-like sweet taste and super strong potency, this strain is very popular among serious marijuana enthusiasts.
![]() 70% INDICA – 30% SATIVA
70% INDICA – 30% SATIVA
![]() FOR SOUVENIR PURPOSES ONLY
FOR SOUVENIR PURPOSES ONLY ![]()
![]() FEMINIZED & TOP QUALITY
FEMINIZED & TOP QUALITY ![]()
![]() VERY HIGH THC LEVEL 21-25%
VERY HIGH THC LEVEL 21-25%
![]() FAST, DISCREET, DOMESTIC SHIPPING
FAST, DISCREET, DOMESTIC SHIPPING ![]()
SKU: GelatoA
Auto, Cannabis Seeds, Indica Dominant
Auto Blueberry Feminized Seeds
Auto Blueberry has a sweet fruity flavour and aroma, with notes of blueberry and spices. These autos can be flowered any time of the year provided temperature stays above 10°C. This cross between Blueberry and a Canadian Ruderalis produces stout plants with flowers that have medium to large calyxes with red, purple and also blue colors, especially when grown during lower temperature at night. This genetical mixture is a true masterpiece!
Auto flowering seeds will flower on their own normally after 2-4 weeks of growth without any light schedule alteration, creating compact plants and with a shorter growing period.
![]() 70% INDICA – 10% SATIVA – 20% Ruderalis
70% INDICA – 10% SATIVA – 20% Ruderalis
![]() FOR SOUVENIR PURPOSES ONLY
FOR SOUVENIR PURPOSES ONLY ![]()
![]() FEMINIZED, AUTO & TOP QUALITY
FEMINIZED, AUTO & TOP QUALITY ![]()
![]() HIGH THC LEVEL 19-20%
HIGH THC LEVEL 19-20%
![]() FAST, DISCREET, DOMESTIC SHIPPING
FAST, DISCREET, DOMESTIC SHIPPING ![]()
SKU: Blue
Auto, Cannabis Seeds, Free Seeds Promo, Indica Dominant
Auto Northern Lights Feminized Seeds (+ Free Seeds)
Auto, Cannabis Seeds, Free Seeds Promo, Indica Dominant
Auto Northern Lights Feminized Seeds (+ Free Seeds)
Free Seeds with Every Order (Mention your desired free strain in the comment field at checkout)
Hmmm probably the most famous strain of all time? And for good reason….. A strong Indica praised for its remarkably resinous buds, fast flowering and easy to grow resilience. This strain has been setting the standard for decades! Well worth your attention, these are fast growing high quality seeds with wow factor.
Auto flowering seeds will flower on their own normally after 2-4 weeks of growth without any light schedule alteration, creating compact plants and with a shorter growing period.
![]() 90% INDICA – 10% SATIVA
90% INDICA – 10% SATIVA
![]() FOR SOUVENIR PURPOSES ONLY
FOR SOUVENIR PURPOSES ONLY ![]()
![]() FEMINIZED & TOP QUALITY
FEMINIZED & TOP QUALITY ![]()
![]() VERY HIGH THC LEVEL 19-24%
VERY HIGH THC LEVEL 19-24%
![]() FAST, DISCREET, DOMESTIC SHIPPING
FAST, DISCREET, DOMESTIC SHIPPING ![]()
SKU: NLA
Auto, Cannabis Seeds, Indica Dominant
Auto Bubblegum Feminized Seeds
After coming to Holland from USA as a clone-only strain, Bubblegum became an immediate hit across Europe. It has a large bubbly buds and a very powerful effect and can easily surprise those who need emotional and physical relief. This strain has a unique bubble gum smell too due to it’s cross with South Indian x Holland x Blueberry genetics. Its effect is balanced, powerful, physical and cerebral. Initially stimulating and invigorating. A connoisseurs specialty.
Auto flowering seeds will flower on their own normally after 2-4 weeks of growth without any light schedule alteration, creating compact plants and with a shorter growing period.
![]() 80% INDICA – 20% SATIVA
80% INDICA – 20% SATIVA
![]() FOR SOUVENIR PURPOSES ONLY
FOR SOUVENIR PURPOSES ONLY ![]()
![]() FEMINIZED, AUTO & TOP QUALITY
FEMINIZED, AUTO & TOP QUALITY ![]()
![]() VERY HIGH THC LEVEL 20-27%
VERY HIGH THC LEVEL 20-27%
![]() FAST, DISCREET, DOMESTIC SHIPPING
FAST, DISCREET, DOMESTIC SHIPPING ![]()
SKU: BGA
Product Carousel Tabs
Auto, Cannabis Seeds, Free Seeds Promo, Sativa Dominant
Auto Blue Dream Feminized (+ Free Seeds)
Free Seeds with Every Order (Mention your desired free strain in the comment field at checkout)
Blue Dream has long been an Aussie favorite for it’s balanced Sativa/Indica characteristics leaning towards Sativa dominant. Originating from California, Blue Dream is a cross between Blueberry (Indica) and Haze (Sativa). With a medium-high THC level between 15-21% THC, this strain is very high yielding and easy to grow leading to it’s popularity amongst novice and veteran cannabis growers.
Auto flowering seeds will flower on their own normally after 2-4 weeks of growth without any light schedule alteration, creating compact plants and with a shorter growing period.
As a Sativa dominant, Blue Dream is comparatively quick to grow but will produce larger high yielding plants up to 6 feet tall depending on conditions, with a 8-9 week flowering time and 700+ g/m2. This strain performs well indoors and outdoors with most cultivation methods. With a potent and intense fruity, sweet aroma similar to ripe berries, the high is reported to be creative, happy & euphoric. This strain is also popular with medicinal cannabis users to treat stress, depression and anxiety.
![]() 60% SATIVA – 40% INDICA
60% SATIVA – 40% INDICA
![]() FOR SOUVENIR PURPOSES ONLY
FOR SOUVENIR PURPOSES ONLY ![]()
![]() FEMINIZED & TOP QUALITY
FEMINIZED & TOP QUALITY ![]()
![]() MEDIUM / HIGH THC LEVEL 15-21%
MEDIUM / HIGH THC LEVEL 15-21%
![]() FAST, DISCREET, DOMESTIC SHIPPING
FAST, DISCREET, DOMESTIC SHIPPING ![]()
SKU: BlueDA
Auto, Cannabis Seeds, Multi pack, Sativa Dominant
Multi Pack 10 AUTO Sativa Feminized Seeds
This multi-pack includes 4 of our top feminized AUTO Sativa strains (10+1 seeds total). Hand picked and top quality for your souvenir collection. We’ll ensure you receive up to 4 different feminized strains normally made up of a 3 x 3 x 3 x 2 (11 total) mixture of our most popular strains which may include AUTO Bruce Banner, AUTO Gorilla Glue, AUTO Amensia Haze, AUTO AK-47, AUTO Cocopopo
Auto flowering seeds will flower on their own normally after 2-4 weeks of growth without any light schedule alteration, creating compact plants and with a shorter growing period.
![]() SATIVA DOMINANT (AUTO FLOWERING)
SATIVA DOMINANT (AUTO FLOWERING)
![]() FOR SOUVENIR PURPOSES ONLY
FOR SOUVENIR PURPOSES ONLY ![]()
![]() FEMINIZED & TOP QUALITY
FEMINIZED & TOP QUALITY ![]()
![]() HIGH THC LEVEL
HIGH THC LEVEL
![]() FAST, DISCREET, DOMESTIC SHIPPING
FAST, DISCREET, DOMESTIC SHIPPING ![]()
SKU: n/a
Auto, Cannabis Seeds, Sativa Dominant
Auto Cocopopo Feminized
Here is a rare auto choco strain that will please the true connoisseurs and collectors. The distinctive sweet-bitter characteristics of the original Chocolope strain has been preserved in this high yielding autoflower variety.
The genetics are Cocopopo x Ruderalis which provide an intense aroma and unique flavour of deep notes of chocolate. As a prodominant Sativa strain the effects are uplifting, invigorating and euphoria-producing. The flower time is approx 9-10 weeks yielding between 450-600 g/m2 indoors. Outdoors it will reach a tall height of 70-140cm with a harvest normally after approx 80-90 days assuming the temp stays above 10 degrees celcius. This strain is definately a bit left of centre but well worth your attention!
![]() 75% SATIVA – 5% INDICA – 20% RUDERALIS
75% SATIVA – 5% INDICA – 20% RUDERALIS
![]() FOR SOUVENIR PURPOSES ONLY
FOR SOUVENIR PURPOSES ONLY ![]()
![]() FEMINIZED & TOP QUALITY
FEMINIZED & TOP QUALITY ![]()
![]() VERY HIGH THC LEVEL 20-25%
VERY HIGH THC LEVEL 20-25%
![]() FAST, DISCREET, DOMESTIC SHIPPING
FAST, DISCREET, DOMESTIC SHIPPING ![]()
SKU: coco
Auto, Cannabis Seeds, Free Seeds Promo, Highest THC, Most Popular, Sativa Dominant
Auto Bruce Banner #5 Feminized (+ Free Seeds)
Auto, Cannabis Seeds, Free Seeds Promo, Highest THC, Most Popular, Sativa Dominant
Auto Bruce Banner #5 Feminized (+ Free Seeds)
Free Seeds with Every Order (Mention your desired free strain in the comment field at checkout)
The iconic Autoflowering Bruce Banner #5 is now available in Australia! This strain is super easy to grow and offers very heavy yielding plants with thick, intense diesel flavoured fruity buds. As an Autoflower, the plant is medium-sized and performs well indoors and outdoors with any of the available cultivation methods.
Auto flowering seeds will flower on their own normally after 2-4 weeks of growth without any light schedule alteration, creating compact plants and with a shorter growing period.
Bruce Banner has a massive cult following over many years with a flavour posessing distinct earthy wood with sweet strawberry undertones. As a Sativa dominant, this strain is highly energising and great for daytime motivation and creativity. Expect a flowering time of 7-8 weeks with a yield of 500 g/m2 and plant height of 80-120cm with flowing at any photoperiod between 12-18 hours so long as the temperature is above 10°C absolute min.
![]() 55% SATIVA – 25% INDICA – 20% RUDERALIS
55% SATIVA – 25% INDICA – 20% RUDERALIS
![]() FOR SOUVENIR PURPOSES ONLY
FOR SOUVENIR PURPOSES ONLY ![]()
![]() FEMINIZED & TOP QUALITY
FEMINIZED & TOP QUALITY ![]()
![]() VERY HIGH THC LEVEL 23%
VERY HIGH THC LEVEL 23%
![]() FAST, DISCREET, DOMESTIC SHIPPING
FAST, DISCREET, DOMESTIC SHIPPING ![]()
SKU: BBA
Auto, Cannabis Seeds, Free Seeds Promo, Highest THC, Most Popular, Sativa Dominant
Auto Gorilla Glue Feminized Seeds (+ Free Seeds)
Auto, Cannabis Seeds, Free Seeds Promo, Highest THC, Most Popular, Sativa Dominant
Auto Gorilla Glue Feminized Seeds (+ Free Seeds)
Free Seeds with Every Order (Mention your desired free strain in the comment field at checkout)
One of the strongest cannabis strains available this one is recommended for the serious marijuana consumer! This popular strain has also won several cannabis awards like the Michigan and Los Angeles Cannabis Cups in 2014, and the High Times Jamaican World Cup.
Auto flowering seeds will flower on their own normally after 2-4 weeks of growth without any light schedule alteration, creating compact plants and with a shorter growing period.
![]() 50% INDICA – 50% SATIVA
50% INDICA – 50% SATIVA
![]() FOR SOUVENIR PURPOSES ONLY
FOR SOUVENIR PURPOSES ONLY ![]()
![]() FEMINIZED & TOP QUALITY
FEMINIZED & TOP QUALITY ![]()
![]() VERY HIGH THC LEVEL 19-24%
VERY HIGH THC LEVEL 19-24%
![]() FAST, DISCREET, DOMESTIC SHIPPING
FAST, DISCREET, DOMESTIC SHIPPING ![]()
SKU: GGA
Auto, Cannabis Seeds, Sativa Dominant
Auto Amnesia Haze Feminized
The Dutch classic! This Sativa dominent strain has won several cannabis cups over the years and is charicterized by mouth watering notes of lemon, incense and cedarwood with a very uplifting & stimulating high. This Sativa has a longer flowering time but the patient grower will be rewarded with a truly supreme quality outstanding end product.
Auto flowering seeds will flower on their own normally after 2-4 weeks of growth without any light schedule alteration, creating compact plants and with a shorter growing period.
![]() 10% INDICA – 90% SATIVA
10% INDICA – 90% SATIVA
![]() FOR SOUVENIR PURPOSES ONLY
FOR SOUVENIR PURPOSES ONLY ![]()
![]() FEMINIZED & TOP QUALITY
FEMINIZED & TOP QUALITY ![]()
![]() VERY HIGH THC LEVEL 21-25%
VERY HIGH THC LEVEL 21-25%
![]() FAST, DISCREET, DOMESTIC SHIPPING
FAST, DISCREET, DOMESTIC SHIPPING ![]()
SKU: AHA
Auto, Cannabis Seeds, Free Seeds Promo, Highest THC, Sativa Dominant
Auto AK-47 Feminized Seeds (+ Free Seeds)
Auto, Cannabis Seeds, Free Seeds Promo, Highest THC, Sativa Dominant
Auto AK-47 Feminized Seeds (+ Free Seeds)
Free Seeds with Every Order (Mention your desired free strain in the comment field at checkout)
Ak-47 was orginally created by the Netherland’s Serious Seeds in 1992 and has won 16 awards including the High Times Cannabis Cup. People love this strain around the world for its high THC content, strong flavour and high energy effects.
Auto flowering seeds will flower on their own normally after 2-4 weeks of growth without any light schedule alteration, creating compact plants and with a shorter growing period.
![]() 20% INDICA – 80% SATIVA
20% INDICA – 80% SATIVA
![]() FOR SOUVENIR PURPOSES ONLY
FOR SOUVENIR PURPOSES ONLY ![]()
![]() FEMINIZED & TOP QUALITY
FEMINIZED & TOP QUALITY ![]()
![]() VERY HIGH THC LEVEL 18-23%
VERY HIGH THC LEVEL 18-23%
![]() FAST, DISCREET, DOMESTIC SHIPPING
FAST, DISCREET, DOMESTIC SHIPPING ![]()
SKU: AKA
Cannabis Seeds, Exotic Strains, Highest THC, Most Popular, NEW, Photo Period, Sativa Dominant
Mimosa Famosa Feminized Seeds
Cannabis Seeds, Exotic Strains, Highest THC, Most Popular, NEW, Photo Period, Sativa Dominant
Mimosa Famosa Feminized Seeds
Mimosa Famosa, is the upgraded version of the popular ‘Mimosa’ or ‘Purple Mimosa’ which is consistently one of the most potent THC strains around. The ‘Famosa’ version has even higher THC and more intense terpenes. While this strain packs a serious punch, it’s sativa dominant hybrid genetics offer a vibrant, uplifting even talkative high. The flavor of this strain is sour & citrusy with earthy pine notes and a smooth finish.
This strain has been expertly crafted by crossing 2 amazing strains ‘Clementine’ and ‘Purple Punch so the finish can have a nice purple hue and the yield is huge up to 1000 g/m2 with a 9-10 week flowering time indoors. This strain has long branches and tends to be quite bush especially if grown outdoors.
![]() 30% INDICA – 70% SATIVA
30% INDICA – 70% SATIVA
![]() FEMINIZED & TOP QUALITY
FEMINIZED & TOP QUALITY ![]()
![]() VERY VERY! HIGH THC LEVEL 25-33%
VERY VERY! HIGH THC LEVEL 25-33%
![]() FAST, DISCREET, DOMESTIC SHIPPING
FAST, DISCREET, DOMESTIC SHIPPING ![]()
SKU: MF
ON SALE (20% OFF), Photo Period, Sativa Dominant
Amnesia Haze Feminized (On sale)
The Dutch classic! This world famous Sativa dominant strain has won several cannabis cups over the years and is characterized by mouth watering notes of lemon, incense and cedarwood with a very uplifting & stimulating high. This Sativa has a longer flowering time but the patient grower will be rewarded with a truly supreme quality outstanding end product.
This strain is loved for its energetic daytime high, creative spark and old-school Amsterdam pedigree.
![]() 10% INDICA – 90% SATIVA
10% INDICA – 90% SATIVA
![]() FEMINIZED & TOP QUALITY
FEMINIZED & TOP QUALITY ![]()
![]() VERY HIGH THC LEVEL 21-25%
VERY HIGH THC LEVEL 21-25%
![]() FAST, DISCREET, DOMESTIC SHIPPING
FAST, DISCREET, DOMESTIC SHIPPING ![]()
SKU: AH
Cannabis Seeds, Free Seeds Promo, Photo Period, Sativa Dominant
Purple Haze Feminized (+ Free Seeds)
Free Seeds with Every Order (Mention your desired free strain in the comment field at checkout)
Purple Haze was made famous in the 60’s by the Rockstar legend Jimi Hendrix’s. With a 60% sativa and 40% indica blend, this incredibly popular strain originated from Thailand as a cross between Haze & Purple Thai. Strong enough to pack a good punch, but not too crazy, this strain delivers a creative and euphoric high with a pleasant flavour of grape, berry and lavender.
Growing Purple Haze is a straight forward with plants thriving both indoors and outdoors with large yields of 600+m p/2. The plants will reach a medium height, with a distinct purple hue of the flowers when fresh, dulling to a slight purple once dried with a wonderful smell. As this variety has been cultivated for many many years, you can be assured of a stable phenotype that is derived only from the best genetic offerings available today.
![]() 60% SATIVA – 40% INDICA
60% SATIVA – 40% INDICA
![]() FOR SOUVENIR PURPOSES ONLY
FOR SOUVENIR PURPOSES ONLY ![]()
![]() FEMINIZED & TOP QUALITY
FEMINIZED & TOP QUALITY ![]()
![]() MEDIUM / HIGH THC LEVEL 14-19%
MEDIUM / HIGH THC LEVEL 14-19%
![]() FAST, DISCREET, DOMESTIC SHIPPING
FAST, DISCREET, DOMESTIC SHIPPING ![]()
SKU: PH
Cannabis Seeds, Free Seeds Promo, Photo Period, Sativa Dominant
Blue Dream Feminized (+ Free Seeds)
Free Seeds with Every Order (Mention your desired free strain in the comment field at checkout)
Blue Dream has long been an Aussie favorite for it’s balanced Sativa/Indica characteristics leaning towards Sativa dominant. Originating from California, Blue Dream is a cross between Blueberry (Indica) and Haze (Sativa). With a medium-high THC level between 15-21% THC, this strain is very high yielding and easy to grow leading to it’s popularity amongst novice and veteran cannabis growers.
As a Sativa dominant, Blue Dream is comparatively quick to grow but will produce larger high yielding plants up to 6 feet tall depending on conditions, with a 8-9 week flowering time and 700+ g/m2. This strain performs well indoors and outdoors with most cultivation methods. With a potent and intense fruity, sweet aroma similar to ripe berries, the high is reported to be creative, happy & euphoric. This strain is also popular with medicinal cannabis users to treat stress, depression and anxiety.
![]() 60% SATIVA – 40% INDICA
60% SATIVA – 40% INDICA
![]() FOR SOUVENIR PURPOSES ONLY
FOR SOUVENIR PURPOSES ONLY ![]()
![]() FEMINIZED & TOP QUALITY
FEMINIZED & TOP QUALITY ![]()
![]() MEDIUM / HIGH THC LEVEL 15-21%
MEDIUM / HIGH THC LEVEL 15-21%
![]() FAST, DISCREET, DOMESTIC SHIPPING
FAST, DISCREET, DOMESTIC SHIPPING ![]()
SKU: BlueD
Cannabis Seeds, Exotic Strains, ON SALE (20% OFF), Photo Period, Sativa Dominant
Lemon Skunk Feminized (On Sale)
Cannabis Seeds, Exotic Strains, ON SALE (20% OFF), Photo Period, Sativa Dominant
Lemon Skunk Feminized (On Sale)
Lemon Skunk has several first place awards with it’s unique scent, taste and high making it a cannabis connoisseur specialty. Lemon Skunk is a cross between two skunk strains, Skunk #1 and Citris Skunk. Scoring a first place award during the High Life Cup in 2007 and others, this potent strain has complex lemon grass, lemon, orange, cedarwood flavors.
Lemon Skunk grows well in both indoor and outdoor conditions but grows quite large so make sure you have a big space. The flowering time is normally 7-9 weeks with the buds often containing patches of golden oranges with medium size leaves.
Many reviewers describe the Lemon Skunk high as introspection, long lasting and creative. This is a great strain for breeders of all levels you will not be disappointed.
![]() 60% SATIVA – 40% INDICA
60% SATIVA – 40% INDICA
![]() FOR SOUVENIR PURPOSES ONLY
FOR SOUVENIR PURPOSES ONLY ![]()
![]() FEMINIZED & TOP QUALITY
FEMINIZED & TOP QUALITY ![]()
![]() HIGH THC LEVEL 14-22%
HIGH THC LEVEL 14-22%
![]() FAST, DISCREET, DOMESTIC SHIPPING
FAST, DISCREET, DOMESTIC SHIPPING ![]()
SKU: LS
Cannabis Seeds, Free Seeds Promo, Highest THC, Most Popular, Photo Period, Sativa Dominant
Bruce Banner #5 Feminized (+ Free Seeds)
Cannabis Seeds, Free Seeds Promo, Highest THC, Most Popular, Photo Period, Sativa Dominant
Bruce Banner #5 Feminized (+ Free Seeds)
Free Seeds with Every Order (Mention your desired free strain in the comment field at checkout)
The iconic cult classic ultra high THC Bruce Banner #5 is available in Australia! This strain is super easy to grow and offers very heavy yielding plants with thick, intense diesel flavoured fruity buds. As a Sativa dominent, expect larger plants, quite tall with long bushy stems with heavy yields. This strain performs well indoors and outdoors with any of the available cultivation methods.
Bruce Banner has a massive cult following over many years with a flavour posessing distinct earthy wood with sweet strawberry undertones. As a Sativa dominant, this strain with a mix of OG Kush + Strawberry Punch Diesel is highly energising and great for daytime motivation and creativity. Expect a flowering time of 9-11 weeks with a yield of 700 g/m2 and plant height of 150cm with flowing so long as the temperature is above 15°C absolute min.
![]() 65% SATIVA – 35% INDICA
65% SATIVA – 35% INDICA
![]() FOR SOUVENIR PURPOSES ONLY
FOR SOUVENIR PURPOSES ONLY ![]()
![]() FEMINIZED & TOP QUALITY
FEMINIZED & TOP QUALITY ![]()
![]() VERY VERY HIGH THC LEVEL 29%
VERY VERY HIGH THC LEVEL 29%
![]() FAST, DISCREET, DOMESTIC SHIPPING
FAST, DISCREET, DOMESTIC SHIPPING ![]()
SKU: BB
Cannabis Seeds, Exotic Strains, Photo Period, Sativa Dominant
Grapefruit Feminized Seeds
The Vancouver, Canada born strain known and loved for decades is a real uplifter! This 80% Sativa strain has a sweet and fruity aroma similar to the smell of ripe grapefruit It’s an 80’s old secret mix of Cinderalla 99 with a mystical grapefruit flavoured Sativa. With the smell of pineapple and grapefuit this has an uplifting & stimulating high good for focus, creativity and pleasure.
![]() 20% INDICA – 80% SATIVA
20% INDICA – 80% SATIVA
![]() FOR SOUVENIR PURPOSES ONLY
FOR SOUVENIR PURPOSES ONLY ![]()
![]() FEMINIZED & TOP QUALITY
FEMINIZED & TOP QUALITY ![]()
![]() HIGH THC LEVEL 16-18%
HIGH THC LEVEL 16-18%
![]() FAST, DISCREET, DOMESTIC SHIPPING
FAST, DISCREET, DOMESTIC SHIPPING ![]()
SKU: GF
Cannabis Seeds, Photo Period, Sativa Dominant
Sour Diesel Feminized Seeds
Sour D, is renown across North America for it’s very strong sativa dominated effects and unique diesel fuel odour when smoked. Around since the 90s, it was created by crossing Chemdawg and Super Skunk. Sour Diesel has an intense flavour and aroma, with notes of lemon, exotic wood, diesel fuel and spices.
![]() 40% INDICA – 60% SATIVA
40% INDICA – 60% SATIVA
![]() FOR SOUVENIR PURPOSES ONLY
FOR SOUVENIR PURPOSES ONLY ![]()
![]() FEMINIZED & TOP QUALITY
FEMINIZED & TOP QUALITY ![]()
![]() VERY HIGH THC LEVEL 19-24%
VERY HIGH THC LEVEL 19-24%
![]() FAST, DISCREET, DOMESTIC SHIPPING
FAST, DISCREET, DOMESTIC SHIPPING ![]()
SKU: SD
Cannabis Seeds, Free Seeds Promo, Highest THC, Photo Period, Sativa Dominant
AK-47 Feminized Seeds (+Free Seeds)
Cannabis Seeds, Free Seeds Promo, Highest THC, Photo Period, Sativa Dominant
AK-47 Feminized Seeds (+Free Seeds)
Free Seeds with Every Order (Mention your desired free strain in the comment field at checkout)
Ak-47 was orginally created by the Netherland’s Serious Seeds in 1992 and has won 16 awards including the High Times Cannabis Cup. People love this strain around the world for its high THC content, strong flavour and high energy effects.
![]() 20% INDICA – 80% SATIVA
20% INDICA – 80% SATIVA
![]() FOR SOUVENIR PURPOSES ONLY
FOR SOUVENIR PURPOSES ONLY ![]()
![]() FEMINIZED & TOP QUALITY
FEMINIZED & TOP QUALITY ![]()
![]() VERY HIGH THC LEVEL 18-23%
VERY HIGH THC LEVEL 18-23%
![]() FAST, DISCREET, DOMESTIC SHIPPING
FAST, DISCREET, DOMESTIC SHIPPING ![]()
SKU: AK
Auto, Cannabis Seeds, Indica Dominant, Multi pack
Multi Pack 10 AUTO Indica Feminized Seeds
This multi-pack includes 4 of our top feminized Indica strains (10+1 seeds total). Hand picked and top quality for your souvenir collection. We’ll ensure you receive up to 4 different feminized strains normally made up of a 3 x 3 x 3 x 2 (11 total) mixture of our most popular strains which may include AUTO Northern Lights, AUTO White Widow, AUTO Gelato, AUTO Blueberry, AUTO Bubblegum, AUTO Cocopopo
Auto flowering seeds will flower on their own normally after 2-4 weeks of growth without any light schedule alteration, creating compact plants and with a shorter growing period.
![]() INDICA DOMINANT (Auto Flowering)
INDICA DOMINANT (Auto Flowering)
![]() FOR SOUVENIR PURPOSES ONLY
FOR SOUVENIR PURPOSES ONLY ![]()
![]() FEMINIZED & TOP QUALITY
FEMINIZED & TOP QUALITY ![]()
![]() HIGH THC LEVEL
HIGH THC LEVEL
![]() FAST, DISCREET, DOMESTIC SHIPPING
FAST, DISCREET, DOMESTIC SHIPPING ![]()
SKU: n/a
Auto, Cannabis Seeds, Free Seeds Promo, Indica Dominant
Auto White Widow Feminized (+ Free Seeds)
Free Seeds with Every Order (Mention your desired free strain in the comment field at checkout)
White Widow is quite possibly the most famous Cannabis strain ever. Originally cultivated in the Netherlands, this balanced Indica/Sativa is a cross between Brazilian Sativa Landrace and a special resin enhanced South Indian Indica. WW has been a prominent staple of the Dutch coffeeshops for over 25 years. Our feminized version is very well balanced through selective breeding with only the highest quailty phenotypes. White Widow has brought us many varieites such as White Russian, Blue Widow, and White Rhino, however there is nothing like the first and the best strain, which flowers in 60 days indoors. These are high quality seeds that are sure to impress.
Auto flowering seeds will flower on their own normally after 2-4 weeks of growth without any light schedule alteration, creating compact plants and with a shorter growing period.
![]() 60% INDICA – 40% SATIVA
60% INDICA – 40% SATIVA
![]() FOR SOUVENIR PURPOSES ONLY
FOR SOUVENIR PURPOSES ONLY ![]()
![]() FEMINIZED & TOP QUALITY
FEMINIZED & TOP QUALITY ![]()
![]() VERY HIGH THC LEVEL 18-21%
VERY HIGH THC LEVEL 18-21%
![]() FAST, DISCREET, DOMESTIC SHIPPING
FAST, DISCREET, DOMESTIC SHIPPING ![]()
SKU: WWA
Auto, Cannabis Seeds, Free Seeds Promo, Highest THC, Indica Dominant
Auto Gelato Feminized Seeds (+ Free Seeds)
Auto, Cannabis Seeds, Free Seeds Promo, Highest THC, Indica Dominant
Auto Gelato Feminized Seeds (+ Free Seeds)
Free Seeds with Every Order (Mention your desired free strain in the comment field at checkout)
Fruity Gelato Goodness… This is an amazing strain! Another ‘Cali’ wonder, this strain is a combination of Girl Scout Cookies and Sunset Sherbet with a desert-like sweet taste and super strong potency, this strain is very popular among serious marijuana enthusiasts.
![]() 70% INDICA – 30% SATIVA
70% INDICA – 30% SATIVA
![]() FOR SOUVENIR PURPOSES ONLY
FOR SOUVENIR PURPOSES ONLY ![]()
![]() FEMINIZED & TOP QUALITY
FEMINIZED & TOP QUALITY ![]()
![]() VERY HIGH THC LEVEL 21-25%
VERY HIGH THC LEVEL 21-25%
![]() FAST, DISCREET, DOMESTIC SHIPPING
FAST, DISCREET, DOMESTIC SHIPPING ![]()
SKU: GelatoA
Auto, Cannabis Seeds, Indica Dominant
Auto Blueberry Feminized Seeds
Auto Blueberry has a sweet fruity flavour and aroma, with notes of blueberry and spices. These autos can be flowered any time of the year provided temperature stays above 10°C. This cross between Blueberry and a Canadian Ruderalis produces stout plants with flowers that have medium to large calyxes with red, purple and also blue colors, especially when grown during lower temperature at night. This genetical mixture is a true masterpiece!
Auto flowering seeds will flower on their own normally after 2-4 weeks of growth without any light schedule alteration, creating compact plants and with a shorter growing period.
![]() 70% INDICA – 10% SATIVA – 20% Ruderalis
70% INDICA – 10% SATIVA – 20% Ruderalis
![]() FOR SOUVENIR PURPOSES ONLY
FOR SOUVENIR PURPOSES ONLY ![]()
![]() FEMINIZED, AUTO & TOP QUALITY
FEMINIZED, AUTO & TOP QUALITY ![]()
![]() HIGH THC LEVEL 19-20%
HIGH THC LEVEL 19-20%
![]() FAST, DISCREET, DOMESTIC SHIPPING
FAST, DISCREET, DOMESTIC SHIPPING ![]()
SKU: Blue
Auto, Cannabis Seeds, Free Seeds Promo, Indica Dominant
Auto Northern Lights Feminized Seeds (+ Free Seeds)
Auto, Cannabis Seeds, Free Seeds Promo, Indica Dominant
Auto Northern Lights Feminized Seeds (+ Free Seeds)
Free Seeds with Every Order (Mention your desired free strain in the comment field at checkout)
Hmmm probably the most famous strain of all time? And for good reason….. A strong Indica praised for its remarkably resinous buds, fast flowering and easy to grow resilience. This strain has been setting the standard for decades! Well worth your attention, these are fast growing high quality seeds with wow factor.
Auto flowering seeds will flower on their own normally after 2-4 weeks of growth without any light schedule alteration, creating compact plants and with a shorter growing period.
![]() 90% INDICA – 10% SATIVA
90% INDICA – 10% SATIVA
![]() FOR SOUVENIR PURPOSES ONLY
FOR SOUVENIR PURPOSES ONLY ![]()
![]() FEMINIZED & TOP QUALITY
FEMINIZED & TOP QUALITY ![]()
![]() VERY HIGH THC LEVEL 19-24%
VERY HIGH THC LEVEL 19-24%
![]() FAST, DISCREET, DOMESTIC SHIPPING
FAST, DISCREET, DOMESTIC SHIPPING ![]()
SKU: NLA
Auto, Cannabis Seeds, Indica Dominant
Auto Bubblegum Feminized Seeds
After coming to Holland from USA as a clone-only strain, Bubblegum became an immediate hit across Europe. It has a large bubbly buds and a very powerful effect and can easily surprise those who need emotional and physical relief. This strain has a unique bubble gum smell too due to it’s cross with South Indian x Holland x Blueberry genetics. Its effect is balanced, powerful, physical and cerebral. Initially stimulating and invigorating. A connoisseurs specialty.
Auto flowering seeds will flower on their own normally after 2-4 weeks of growth without any light schedule alteration, creating compact plants and with a shorter growing period.
![]() 80% INDICA – 20% SATIVA
80% INDICA – 20% SATIVA
![]() FOR SOUVENIR PURPOSES ONLY
FOR SOUVENIR PURPOSES ONLY ![]()
![]() FEMINIZED, AUTO & TOP QUALITY
FEMINIZED, AUTO & TOP QUALITY ![]()
![]() VERY HIGH THC LEVEL 20-27%
VERY HIGH THC LEVEL 20-27%
![]() FAST, DISCREET, DOMESTIC SHIPPING
FAST, DISCREET, DOMESTIC SHIPPING ![]()
SKU: BGA
Cannabis Seeds, Exotic Strains, Highest THC, Indica Dominant, NEW, Photo Period
Runtz Gluntz Feminized Seeds
Cannabis Seeds, Exotic Strains, Highest THC, Indica Dominant, NEW, Photo Period
Runtz Gluntz Feminized Seeds
Runtz Gluntz won Leafy’s strain of the year in 2020 for it’s candy like sweetness and dense buds that look like they’ve been coated in sugar. Born in Los Angeles, this strain is a cross between Zkittly Zi Zi (winner in 2016 Emerald cup) and Gelato (also legendary for sweet lemony terpenes). Runtz Gluntz has a very high THC content up to 28% and is also capable of producing large crops indoors and outdoors with thick frosty buds and intense aroma with sweet candy like characteristics when consumed.
This strain fits strongly into the heavy hitter category with a long-lasting uplifting and euphoric effect with deep relaxation of the body also suitable for medical purposes. With a fast flowering time around 8-9 weeks and a yield up to 800 g/m2 it’s a candy flavored powerhouse that is sure to please
![]() 70% INDICA – 30% SATIVA
70% INDICA – 30% SATIVA
![]() FEMINIZED & TOP QUALITY
FEMINIZED & TOP QUALITY ![]()
![]() VERY VERY HIGH THC LEVEL 24-28%
VERY VERY HIGH THC LEVEL 24-28%
![]() FAST, DISCREET, DOMESTIC SHIPPING
FAST, DISCREET, DOMESTIC SHIPPING ![]()
SKU: RG
Cannabis Seeds, Exotic Strains, Free Seeds Promo, Highest THC, Indica Dominant, NEW, Photo Period
Watermelon Jam Feminized Seeds
Cannabis Seeds, Exotic Strains, Free Seeds Promo, Highest THC, Indica Dominant, NEW, Photo Period
Watermelon Jam Feminized Seeds
Free Seeds with Every Order (Mention your desired free strain in the comment field at checkout)
Watermelon Jam is a Indica-heavy cannabis connoisseur favorite with a wonderfully fruity terpene profile, strong THC, heavy yielder that is also beginner grower friendly. The origin story is somewhat elusive with it’s lineage tracing back to selected Watermelon genetics. Developed in Europe around 2010, Watermelon Jam is all about taking everything growers and consumers loved (flavour, potency, yield) and turning the dial up a few notches.
Suitable for indoor or outdoor growing, it enjoys semi-humid environments. Yielding up to 950 g/m2 under optimal conditions, this strain has strong lateral branches and is definitely a heavy yielder. This exotic strain will not disappoint for those who like a uniquely fruity, heavy hitting Indica.
![]() 80% INDICA – 20% SATIVA
80% INDICA – 20% SATIVA
![]() FEMINIZED & TOP QUALITY
FEMINIZED & TOP QUALITY ![]()
![]() VERY HIGH THC LEVEL 20-26%
VERY HIGH THC LEVEL 20-26%
![]() FAST, DISCREET, DOMESTIC SHIPPING
FAST, DISCREET, DOMESTIC SHIPPING ![]()
SKU: WJ
Cannabis Seeds, Indica Dominant, Most Popular, ON SALE (20% OFF), Photo Period
Big Bud Feminized (On Sale)
Cannabis Seeds, Indica Dominant, Most Popular, ON SALE (20% OFF), Photo Period
Big Bud Feminized (On Sale)
Big Bud is a famous cannabis strain not only for massive yields, but also for an outstanding pedigree which has been refined over many years. This Indica dominant hybrid has incredible vigor and often record breaking production derived from Afghani Northern Lights with Skunk genetics. The resin profile is very impressive coating even the inner flower clusters and this strain has a powerful yet balanced stone and intense flavor and smell profile with it’s skunk sativa ancestry. On both smaller and large plants, the flowers on a Bigger Bud plant are huge, solid and packed with resin. A very worthy addition to any collection!
![]() 85% INDICA – 15% SATIVA
85% INDICA – 15% SATIVA
![]() FOR SOUVENIR PURPOSES ONLY
FOR SOUVENIR PURPOSES ONLY ![]()
![]() FEMINIZED & TOP QUALITY
FEMINIZED & TOP QUALITY ![]()
![]() VERY HIGH THC LEVEL 17-20%
VERY HIGH THC LEVEL 17-20%
![]() FAST, DISCREET, DOMESTIC SHIPPING
FAST, DISCREET, DOMESTIC SHIPPING ![]()
SKU: BigB
Cannabis Seeds, Free Seeds Promo, Indica Dominant, Photo Period
Cheese Feminized (+ Free Seeds)
Free Seeds with Every Order (Mention your desired free strain in the comment field at checkout)
The Cheese Cannabis Strain is one of the best skunk strains available worldwide and probably the most famous coming out of the UK. With a distinctive and very special taste and aroma this strain will have your mouth watering! With a long lasting flavour and scent of cured cheese this strain leaves a lasting impression of skunk and aged cheddar. As an Indica expect a long lasting slow creeping very ‘stoned’ stone from this classic strain.
This strain is medicinally effective against pain and is often used for medicial purposes. With a flowering time of 8-9 weeks the plants are very high yielding especially for an Indica with 850 g/m2 expected under the right conditions. The plant is medium-large and quite branchy with a vine-like growth with impressively large yet fat chunky flowers. The plant likely will need support outdoors especially given the weight of the flowers.
![]() 60% INDICA – 40% SATIVA
60% INDICA – 40% SATIVA
![]() FOR SOUVENIR PURPOSES ONLY
FOR SOUVENIR PURPOSES ONLY ![]()
![]() FEMINIZED & TOP QUALITY
FEMINIZED & TOP QUALITY ![]()
![]() VERY HIGH THC LEVEL 18-21%
VERY HIGH THC LEVEL 18-21%
![]() FAST, DISCREET, DOMESTIC SHIPPING
FAST, DISCREET, DOMESTIC SHIPPING ![]()
SKU: Cheese
Cannabis Seeds, Indica Dominant, Photo Period
Bubblegum Feminized Seeds
After coming to Holland from USA as a clone-only strain, Bubblegum became an immediate hit across Europe. It has a large bubbly buds and a very powerful effect and can easily surprise those who need emotional and physical relief. This strain has a unique bubble gum smell too due to it’s cross with South Indian x Holland x Blueberry genetics. Its effect is balanced, powerful, physical and cerebral. Initially stimulating and invigorating. A connoisseurs specialty.
![]() 80% INDICA – 20% SATIVA
80% INDICA – 20% SATIVA
![]() FOR SOUVENIR PURPOSES ONLY
FOR SOUVENIR PURPOSES ONLY ![]()
![]() FEMINIZED & TOP QUALITY
FEMINIZED & TOP QUALITY ![]()
![]() VERY HIGH THC LEVEL 20-27%
VERY HIGH THC LEVEL 20-27%
![]() FAST, DISCREET, DOMESTIC SHIPPING
FAST, DISCREET, DOMESTIC SHIPPING ![]()
SKU: BG
Cannabis Seeds, Free Seeds Promo, Indica Dominant, Photo Period
White Widow Feminized (+ Free Seeds)
Free Seeds with Every Order (Mention your desired free strain in the comment field at checkout)
White Widow is quite possibly the most famous Cannabis strain ever. Originally cultivated in the Netherlands, this balanced Indica/Sativa is a cross between Brazilian Sativa Landrace and a special resin enhanced South Indian Indica. WW has been a prominent staple of the Dutch coffeeshops for over 25 years. Our feminized version is very well balanced through selective breeding with only the highest quailty phenotypes. White Widow has brought us many varieites such as White Russian, Blue Widow, and White Rhino, however there is nothing like the first and the best strain, which flowers in 60 days indoors. These are high quality seeds that are sure to impress.
![]() 60% INDICA – 40% SATIVA
60% INDICA – 40% SATIVA
![]() FOR SOUVENIR PURPOSES ONLY
FOR SOUVENIR PURPOSES ONLY ![]()
![]() FEMINIZED & TOP QUALITY
FEMINIZED & TOP QUALITY ![]()
![]() VERY HIGH THC LEVEL 18-21%
VERY HIGH THC LEVEL 18-21%
![]() FAST, DISCREET, DOMESTIC SHIPPING
FAST, DISCREET, DOMESTIC SHIPPING ![]()
SKU: WW
Cannabis Seeds, Indica Dominant, Photo Period
Girl Scout Cookies Feminized
An Aussie favourite, this indica dominant strain is blend of OG Kush and Durban Poison with powerful long lasting, relaxing effects for medicinal purposes to help with nausea and pain. This will will certainly keep you well relaxed for that end of day stress relief! This strain has an intense flavour and aroma of citrus and sweet fruit with above average yields.
![]() 80% INDICA – 20% SATIVA
80% INDICA – 20% SATIVA
![]() FOR SOUVENIR PURPOSES ONLY
FOR SOUVENIR PURPOSES ONLY ![]()
![]() FEMINIZED & TOP QUALITY
FEMINIZED & TOP QUALITY ![]()
![]() VERY HIGH THC LEVEL 18-20%
VERY HIGH THC LEVEL 18-20%
![]() FAST, DISCREET, DOMESTIC SHIPPING
FAST, DISCREET, DOMESTIC SHIPPING ![]()
SKU: GSC
Cannabis Seeds, Free Seeds Promo, Indica Dominant, Photo Period
OG Kush Feminized Seeds (+ Free Seeds)
Cannabis Seeds, Free Seeds Promo, Indica Dominant, Photo Period
OG Kush Feminized Seeds (+ Free Seeds)
Free Seeds with Every Order (Mention your desired free strain in the comment field at checkout)
The classic californian OG Kush loves hot temperature and is the proud parent of many popular strains such as girl scout cookies. OG Kush has very high THC levels and is well known for it’s full body high and spicey aroma.
![]() 75% INDICA – 25% SATIVA
75% INDICA – 25% SATIVA
![]() FOR SOUVENIR PURPOSES ONLY
FOR SOUVENIR PURPOSES ONLY ![]()
![]() FEMINIZED & TOP QUALITY
FEMINIZED & TOP QUALITY ![]()
![]() VERY HIGH THC LEVEL 18-23%
VERY HIGH THC LEVEL 18-23%
![]() FAST, DISCREET, DOMESTIC SHIPPING
FAST, DISCREET, DOMESTIC SHIPPING ![]()
SKU: OG
Cannabis Seeds, Free Seeds Promo, Indica Dominant, Most Popular, Photo Period
Northern Lights Feminized Seeds (+Free Seeds)
Cannabis Seeds, Free Seeds Promo, Indica Dominant, Most Popular, Photo Period
Northern Lights Feminized Seeds (+Free Seeds)
Free Seeds with Every Order (Mention your desired free strain in the comment field at checkout)
Hmmm probably the most famous strain of all time? And for good reason….. A strong Indica praised for its remarkably resinous buds, fast flowering and easy to grow resilience. This strain has been setting the standard for decades! Well worth your attention, these are fast growing high quality seeds with wow factor.
![]() 90% INDICA – 10% SATIVA
90% INDICA – 10% SATIVA
![]() FOR SOUVENIR PURPOSES ONLY
FOR SOUVENIR PURPOSES ONLY ![]()
![]() FEMINIZED & TOP QUALITY
FEMINIZED & TOP QUALITY ![]()
![]() VERY HIGH THC LEVEL 19-24%
VERY HIGH THC LEVEL 19-24%
![]() FAST, DISCREET, DOMESTIC SHIPPING
FAST, DISCREET, DOMESTIC SHIPPING ![]()
SKU: NL
Cannabis Seeds, Indica Dominant, Photo Period
Gelato Feminized Seeds
Fruity Gelato Goodness… This is an amazing strain! Another ‘Cali’ wonder, this strain is a combination of Girl Scout Cookies and Sunset Sherbet with a desert-like sweet taste and super strong potency, this strain is very popular among serious marijuana enthusiasts.
![]() 70% INDICA – 30% SATIVA
70% INDICA – 30% SATIVA
![]() FOR SOUVENIR PURPOSES ONLY
FOR SOUVENIR PURPOSES ONLY ![]()
![]() FEMINIZED & TOP QUALITY
FEMINIZED & TOP QUALITY ![]()
![]() VERY HIGH THC LEVEL 21-25%
VERY HIGH THC LEVEL 21-25%
![]() FAST, DISCREET, DOMESTIC SHIPPING
FAST, DISCREET, DOMESTIC SHIPPING ![]()
SKU: Gelato
Cannabis Seeds, Free Seeds Promo, Highest THC, Indica Dominant, Most Popular, Photo Period
Gorilla Glue Feminized Seeds (+ Free Seeds)
Cannabis Seeds, Free Seeds Promo, Highest THC, Indica Dominant, Most Popular, Photo Period
Gorilla Glue Feminized Seeds (+ Free Seeds)
Guerilla Glue (Gorilla Glue) also known as GG4, is one of the strongest cannabis strains available this one is recommended for the serious marijuana consumer! This highly acclaimed strain has won several cannabis awards like the Michigan and Los Angeles Cannabis Cups in 2014, and the High Times Jamaican World Cup.
This is a very potent indica based hybrid strain is a cross between Sour Dubb, Chem’s Sister and Chocolate Diesel. This strain is a favorite not only for it’s potency but also it’s yielding capability as it delivers huge yields with a strong sugar-frosty trichomes and very sticky buds lending to it’s name. You can expect yields of over 700 g/m2 if grown outdoors. Well worth your attention, this strain certainly delivers.
![]() 60% INDICA – 40% SATIVA
60% INDICA – 40% SATIVA
![]() FOR SOUVENIR PURPOSES ONLY
FOR SOUVENIR PURPOSES ONLY ![]()
![]() FEMINIZED & TOP QUALITY
FEMINIZED & TOP QUALITY ![]()
![]() VERY HIGH THC LEVEL 19-28%
VERY HIGH THC LEVEL 19-28%
![]() FAST, DISCREET, DOMESTIC SHIPPING
FAST, DISCREET, DOMESTIC SHIPPING ![]()
SKU: GG
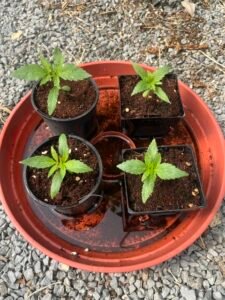
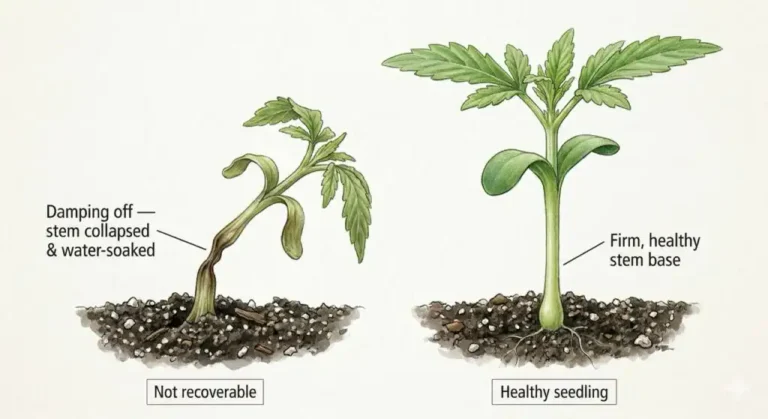

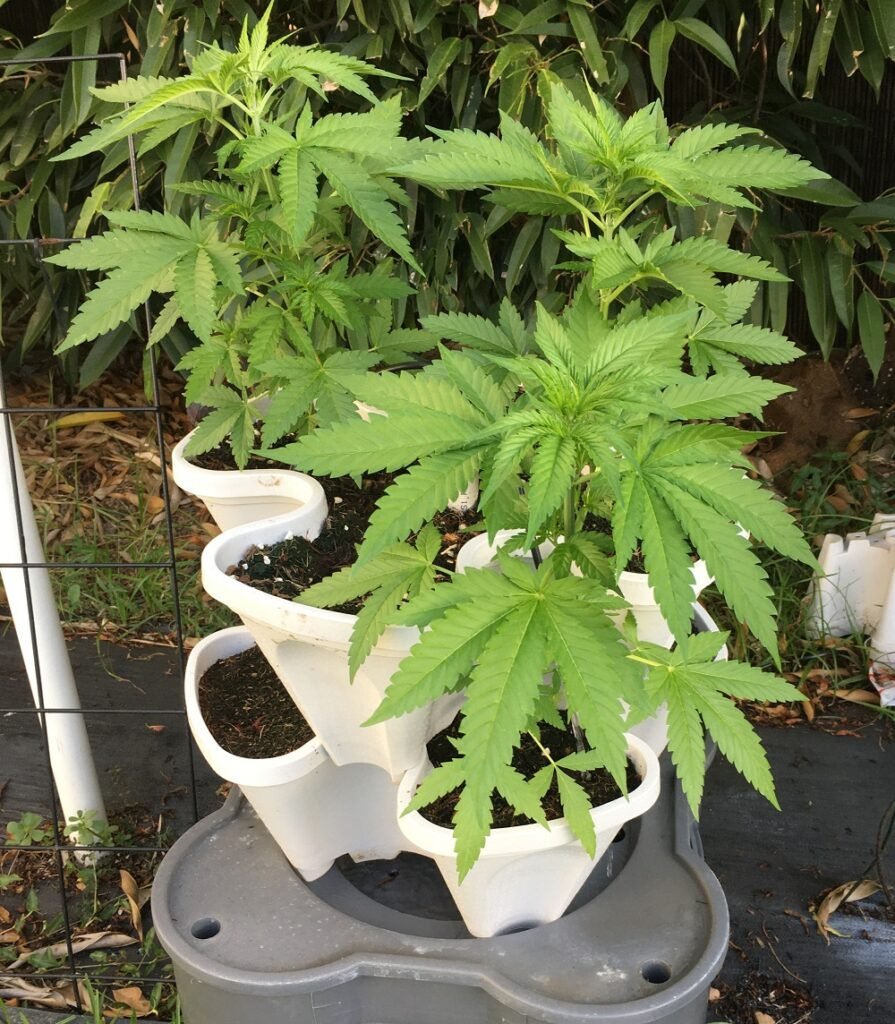
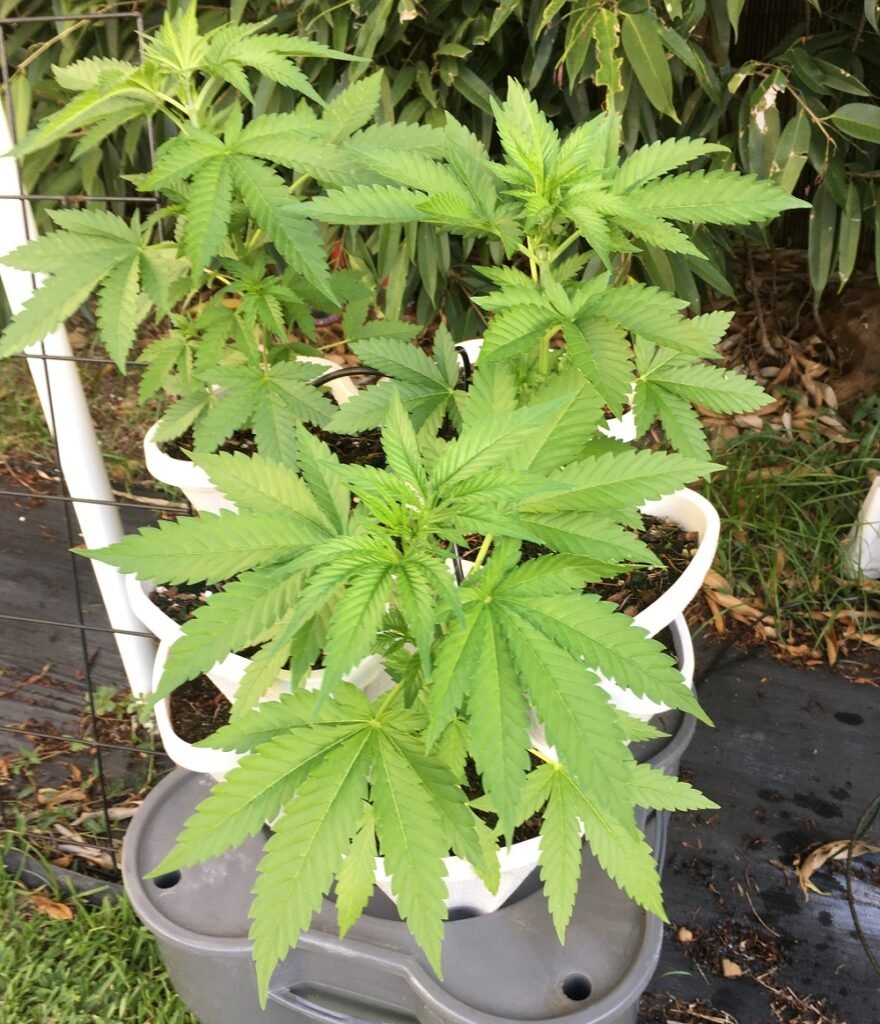
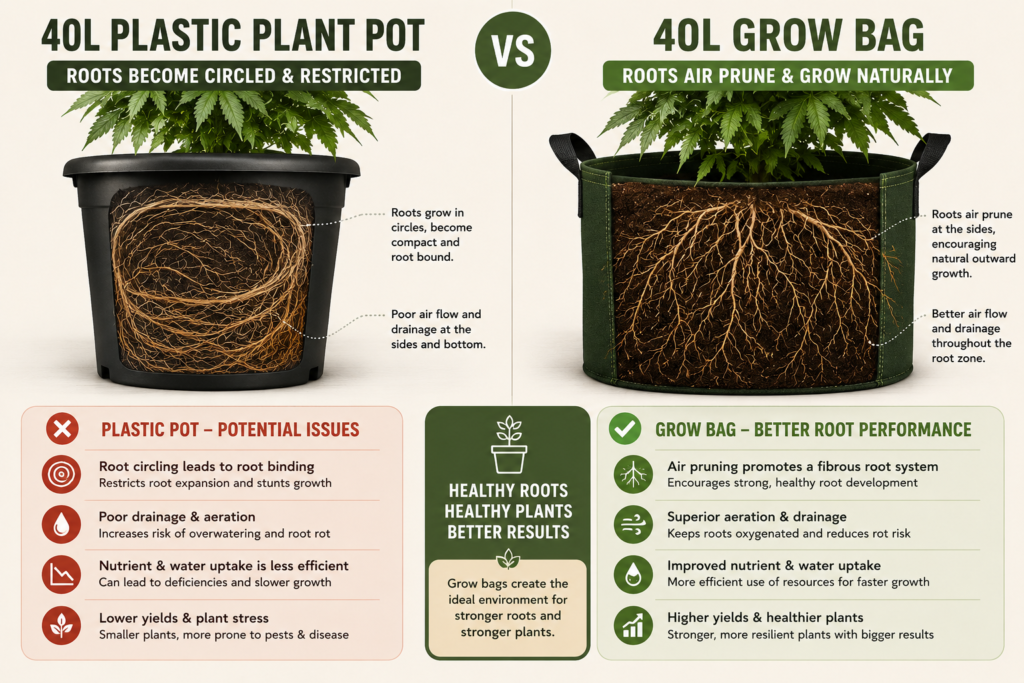
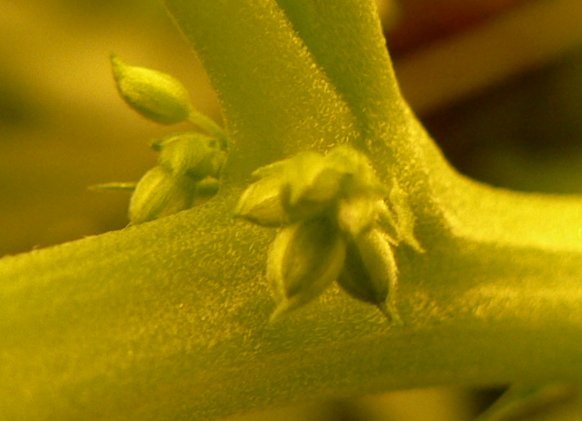
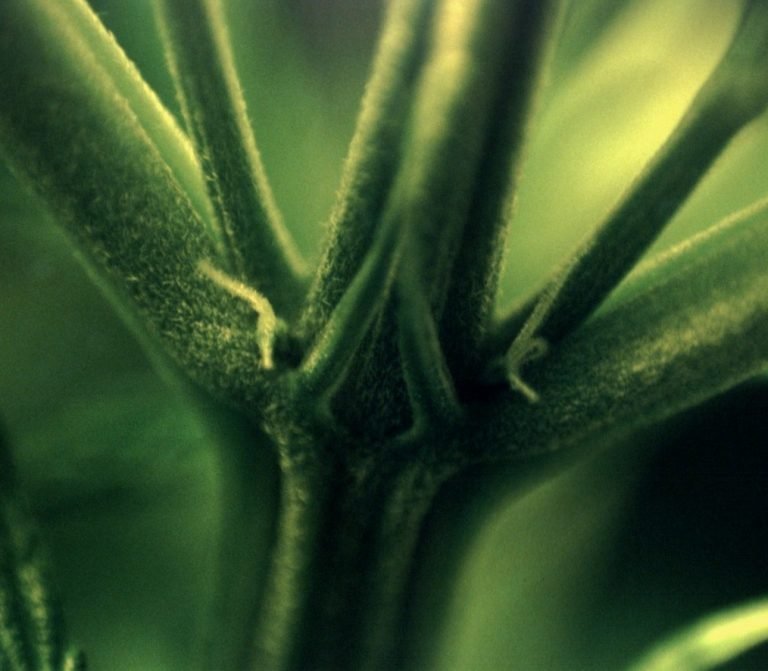
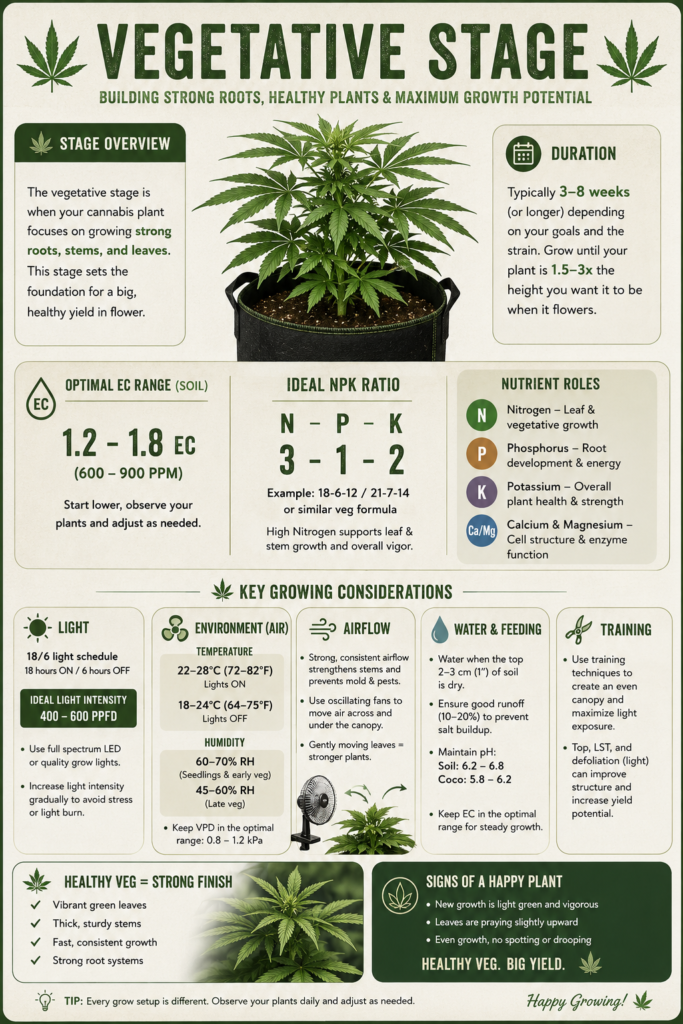
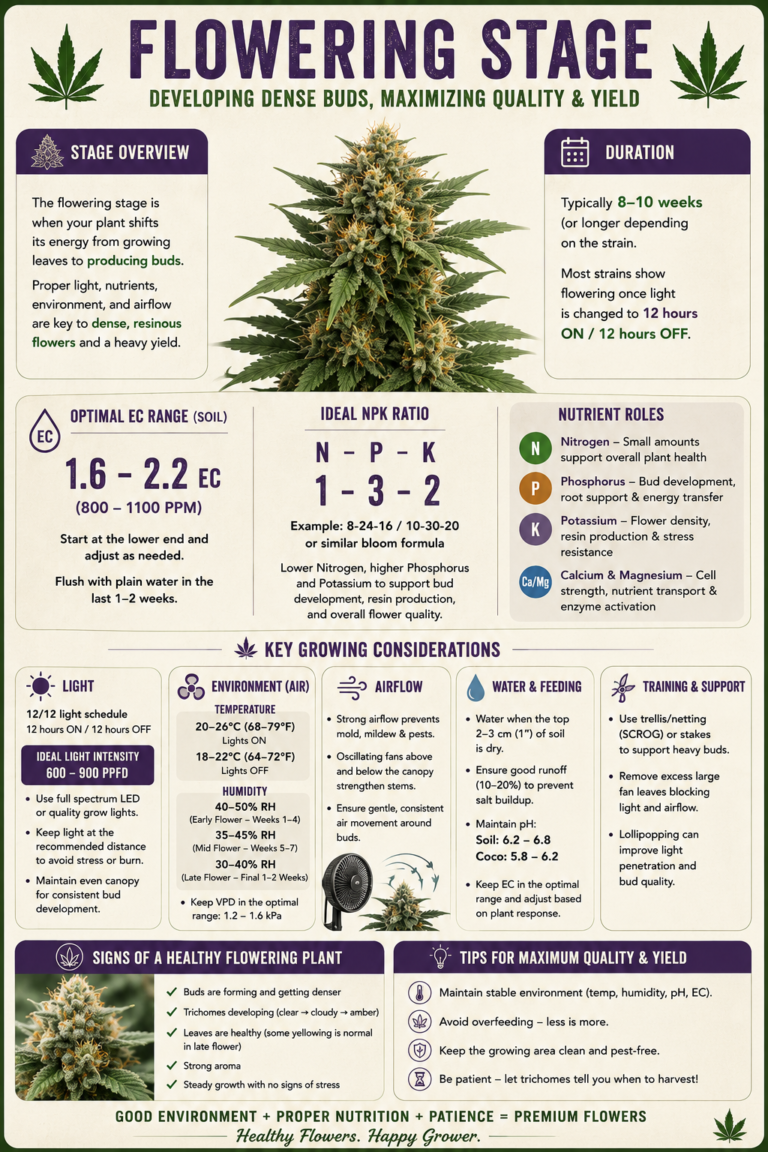
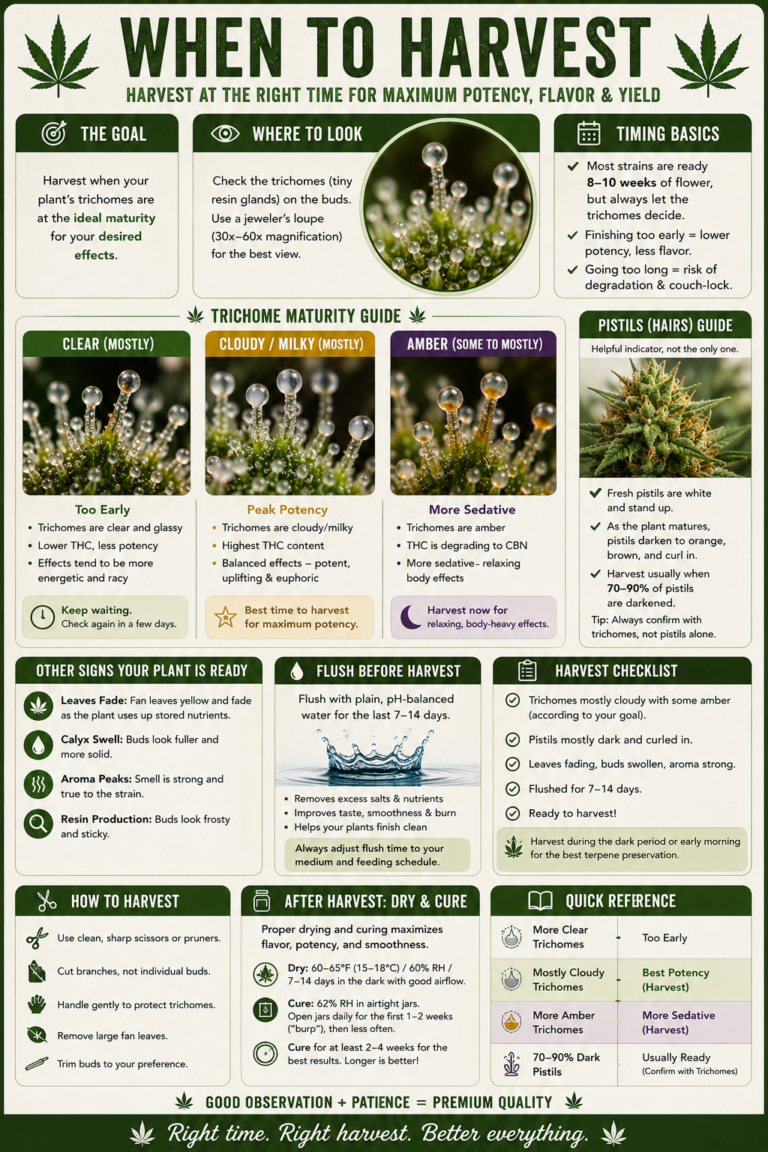
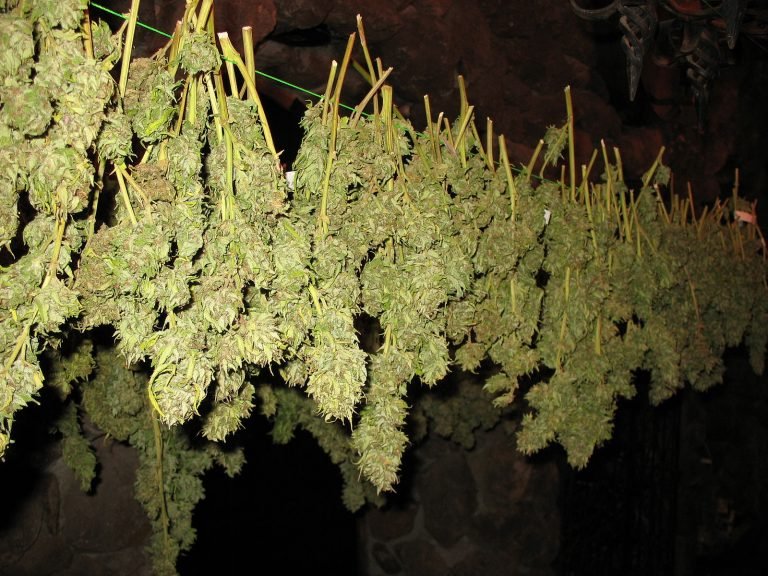
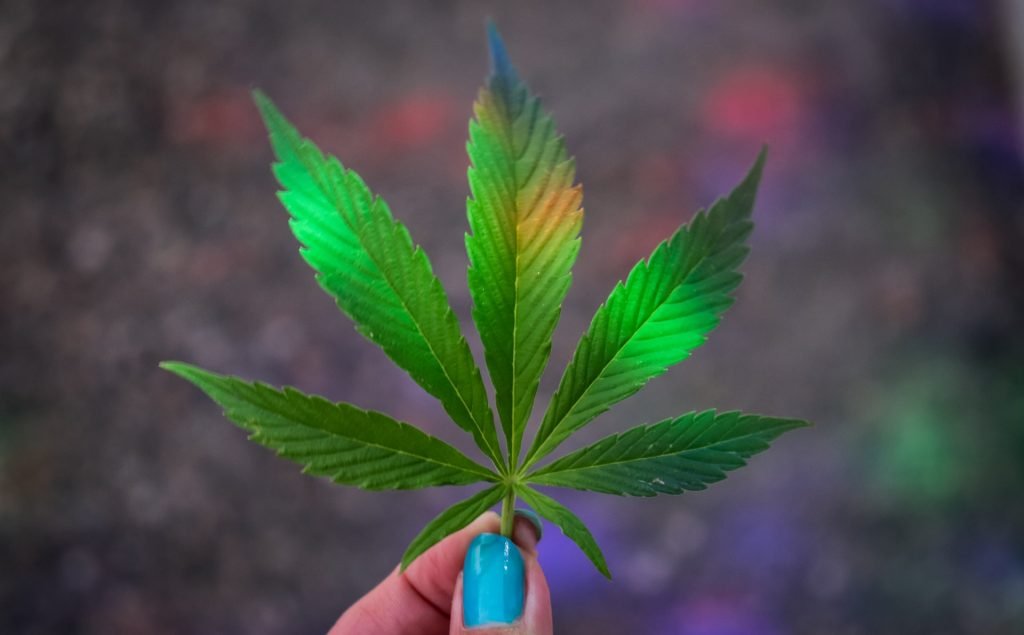
All About Cannabis Overview
CONTENT IN PROGRESS - CHECK BACK SOON!
Tips, Tricks and Troubleshooting
CONTENT IN PROGRESS - CHECK BACK SOON!

Indoor Growing
CONTENT IN PROGRESS - CHECK BACK SOON!

Outdoor Growing
CONTENT IN PROGRESS - CHECK BACK SOON!

Nutrients
CONTENT IN PROGRESS - CHECK BACK SOON!

Growing Systems
CONTENT IN PROGRESS - CHECK BACK SOON!